Important: For working with delivery it is necessary to set VAT rates. These rates are being specified when creating delivery type, legal entity and in the item.
Integration settings in the system are situated in section Administration > Integration > Deliveries.

Select DPD delivery service and let’s get closer to the settings.
Let’s have a look at the main settings of DPD integration. Don’t forget to set the mark «Activated» to activate the integration. In order to get Client number in DPD system (the number of your contract with DPD) and the Unique key for authorization , you need to contact DPD personal manager.
IMPORTANT: Also you need to contact with DPD support with the request to connect the setting for tracking with confirmation.
Note: tracking of postal dispatches is not available in demo-version
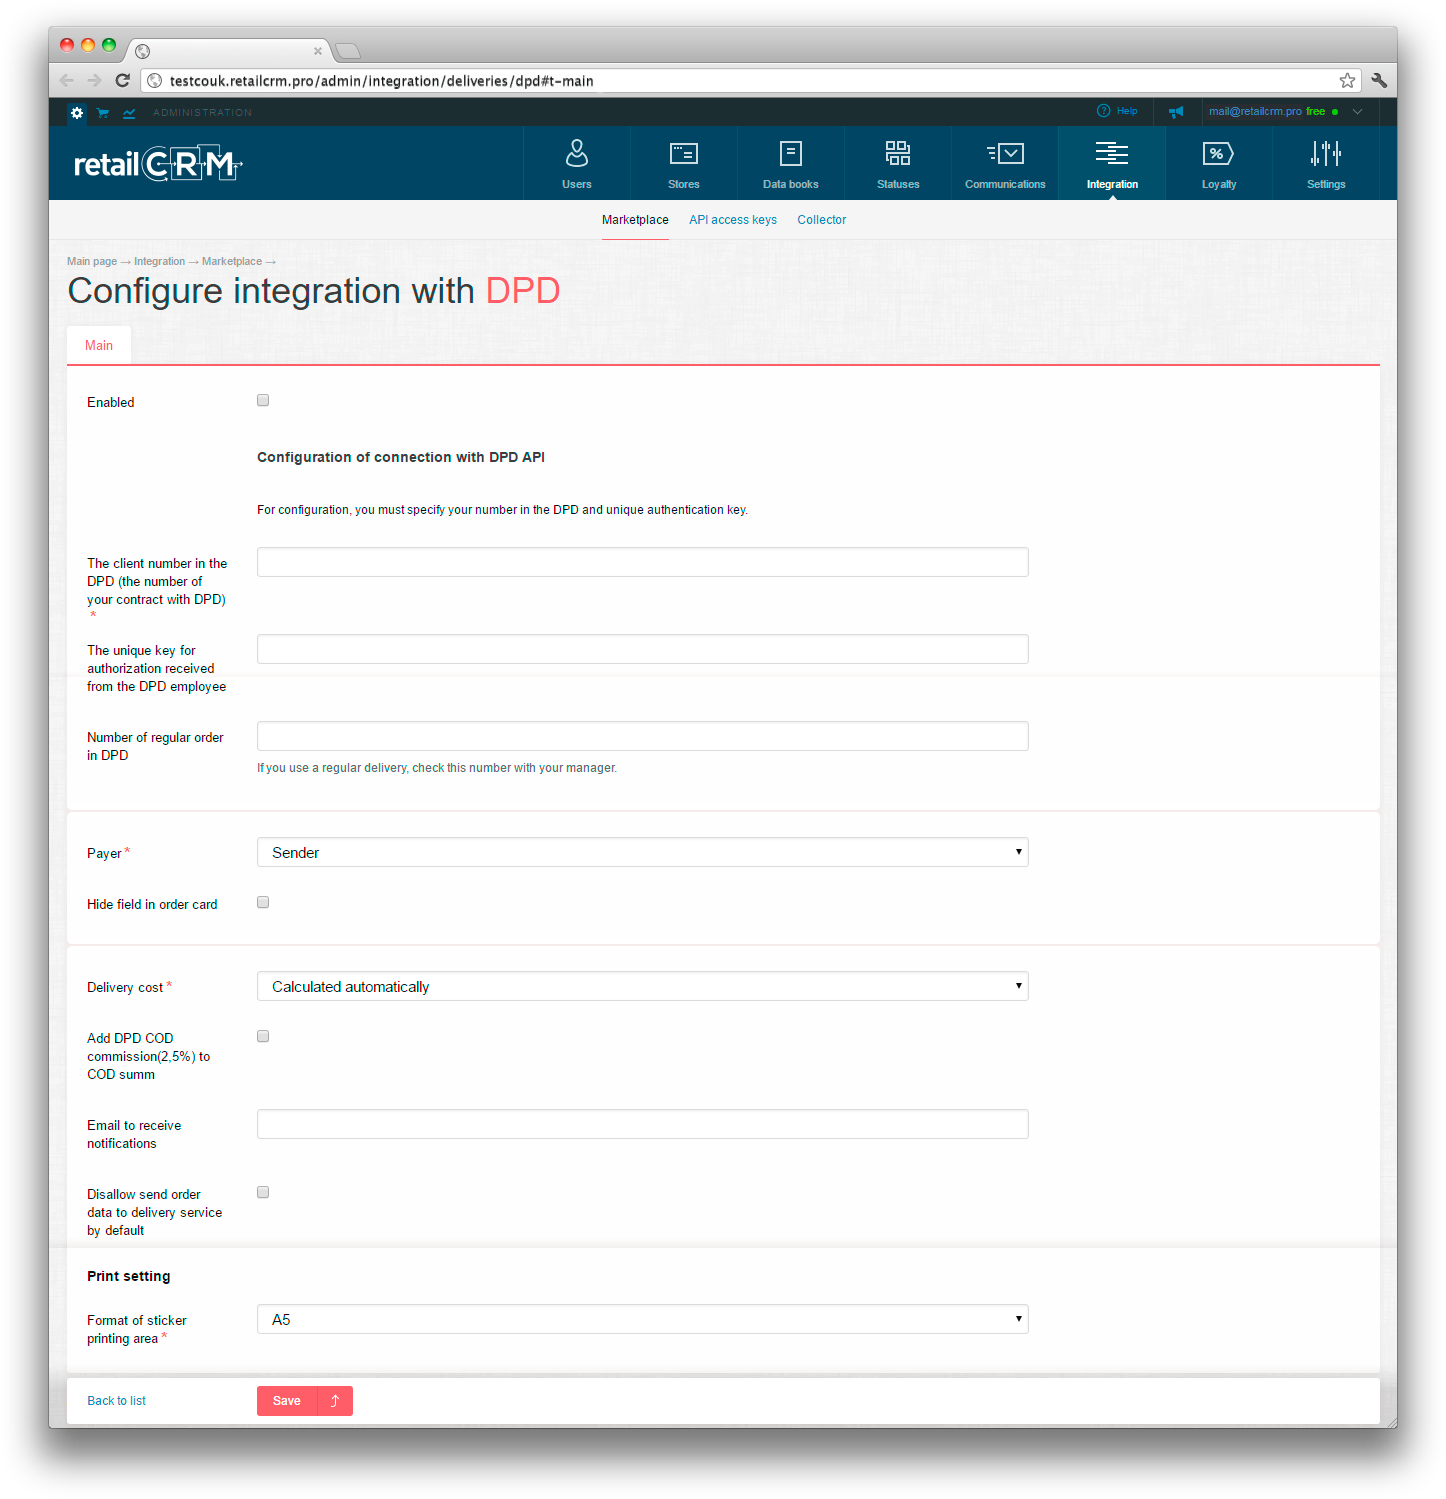
The field «Number of regular order in DPD» will be useful if you use delivery on the regular basis. Specify this number with your DPD manager.

In the «Payer» field you need to specify who will pay for the delivery service: the shop (sender) or the customer (receiver).

If the field «Hide field in the order card» is not marked, you can choose the party, that will pay for the delivery, directly in the order.
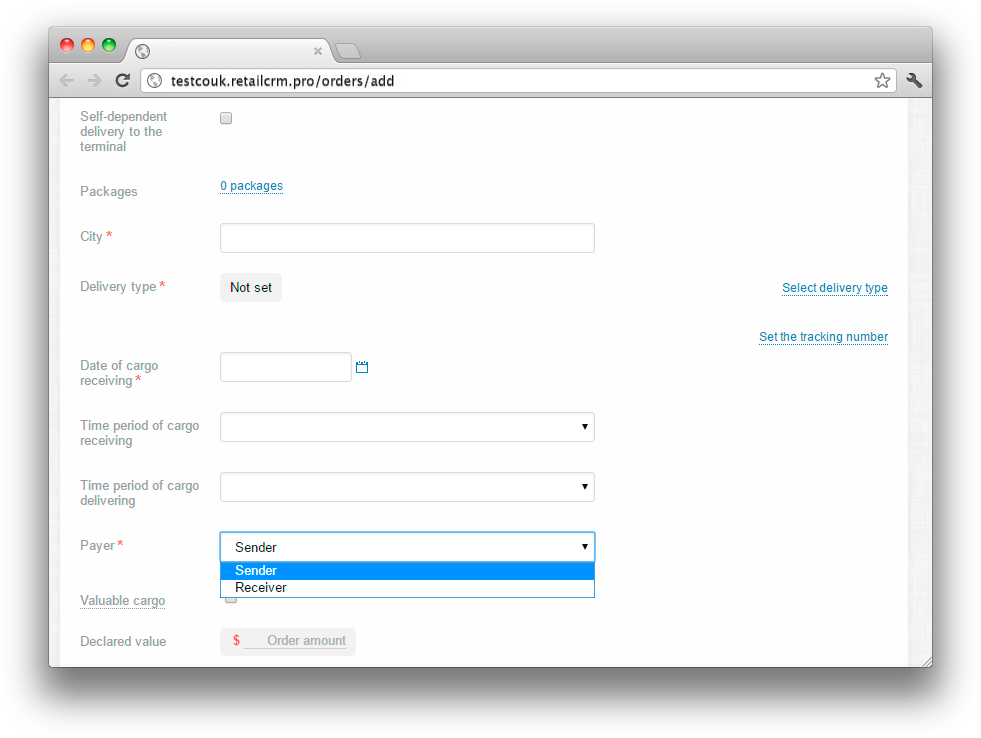
If there is a mark in the field «Hide field in the order card», then it’s not possible to choose the party in the order card, paying for the delivery.

The field «Delivery cost is set by the shop» allows to choose two variants: The First Calculated automatically by delivery service - in this case the cost will be automatically sent to the system from DPD when selecting corresponding delivery and saving the order. The second Set in system - in this case you will need to specify delivery cost manually or send it through API.

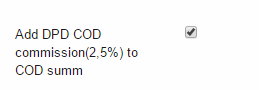
If the box «Add DPD COD commission(2,5%) to COD summ» is checked, the commission fee for COD is calculated atomatically and is summed with the delivery cost.
Specify an e-mail to get notifications from DPD delivery service.

It is also possible to configure a format for printing stickers and the number of stickers on the list. This functionality repeats DPD stickers format and printing settings.

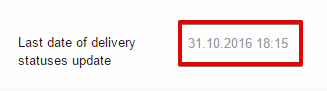
«The date of last delivery status update» allows to estimate how relevant is the information about delivery status in a definite order. It is updated once in several hours.
In this tab you need to specify data on warehouses. The fields “Address” and “Phone number” are obligatory to fill. It is important to specify the address with a street and a house for the warehouses, otherwise the delivery from the warehouse will be made only through the terminal. It is also possible to choose here “Default sending terminal”, which will be inserted in the order automatically.
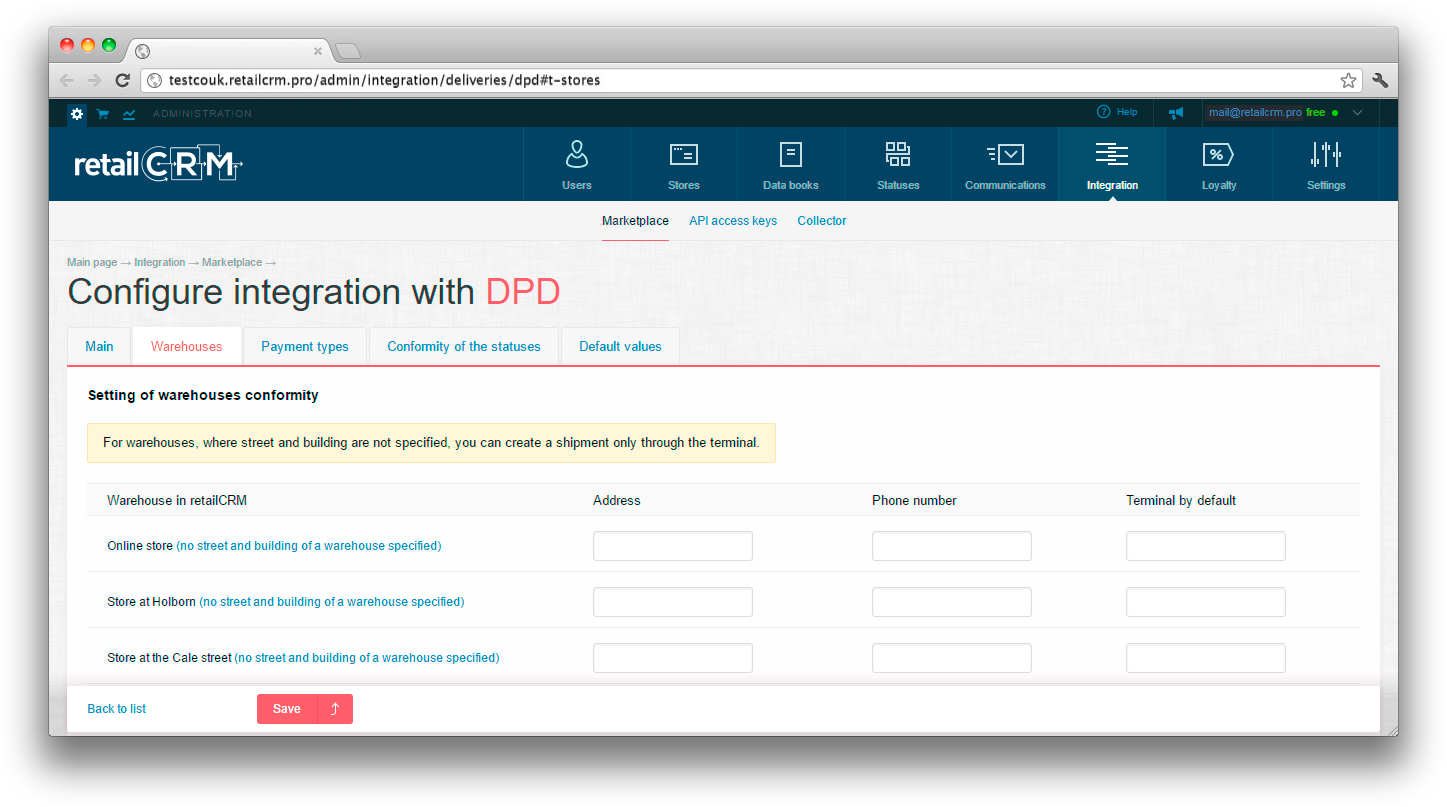
The warehouse addresses of your e-shop are set in section Administration > Shops > Warehouses.
This tab contains a simple configuration of available payment types for DPD delivery type. The mark in the column “Collection on delivery” means, that it is possible to send the order by collection on delivery with this payment type.
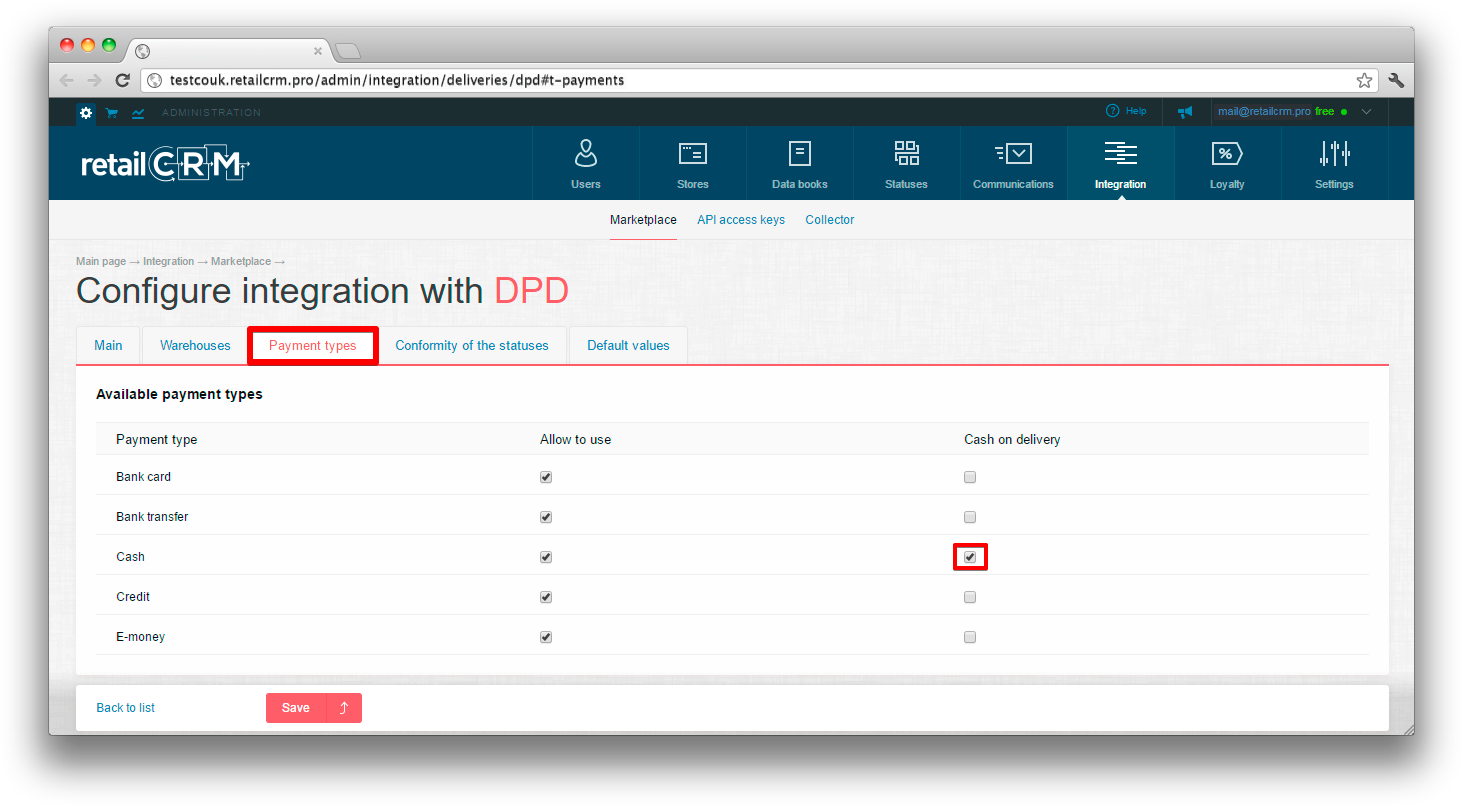
Note: cash on delivery sum must not be more than sum to pay in the order.
It is also possible to set correspondence of DPD statuses to your order statuses for the status in system to change automaically when DPD status is changed. Correspondence data is not necessary for connection to DPD.

On this tab you can set the cargo acceptance time interval and the comment to order, that will be displayed by default.
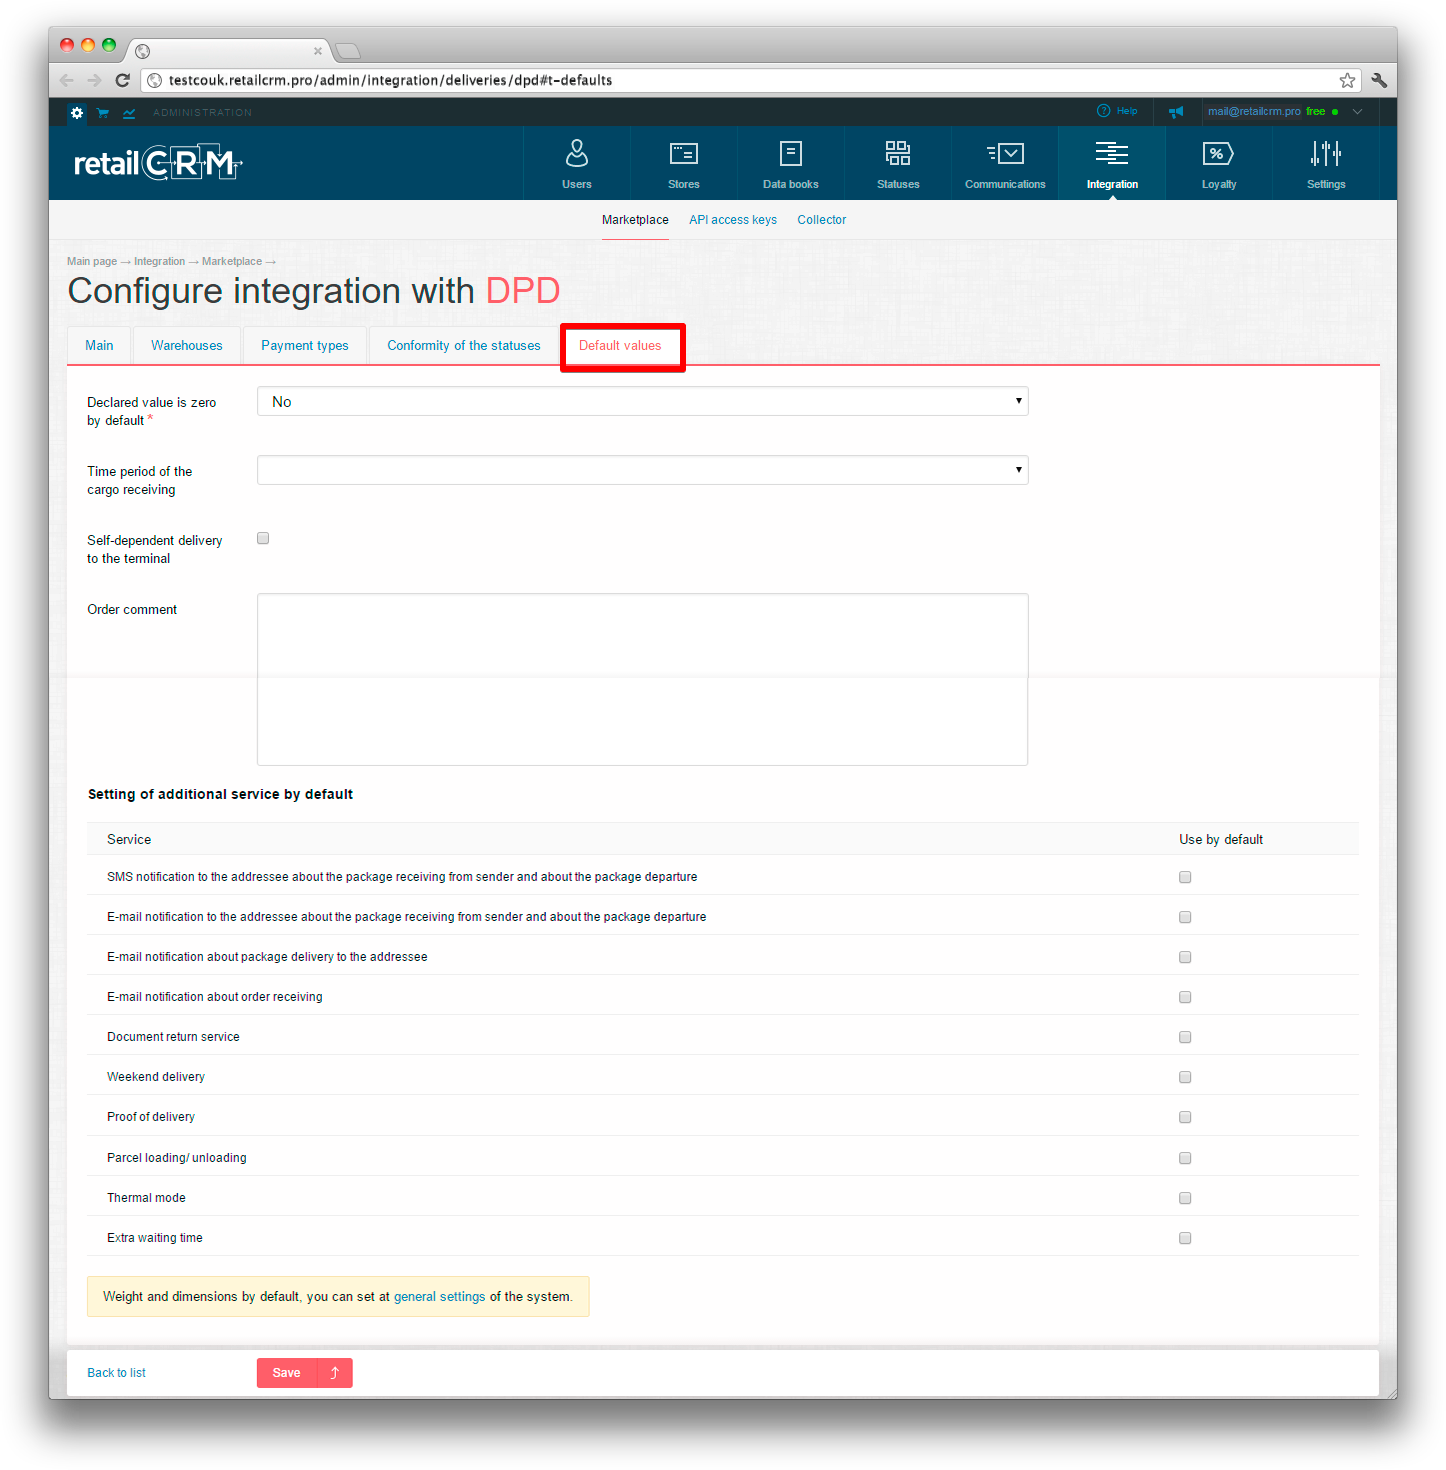
"Declared value is zero by default” sets zero declared value by default.
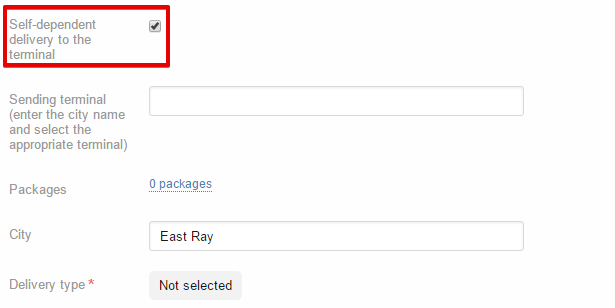
If to set mark “Self-dependent delivery to the terminal”, this means you need to bring goods to DPD terminal yourself, where from they will be sent to destination point.
In the field “Terminal of sending” it is possible to set default DPD terminal, to which the shop will bring its goods.
It is possible to set the default additional services, which your shop uses most of the time.
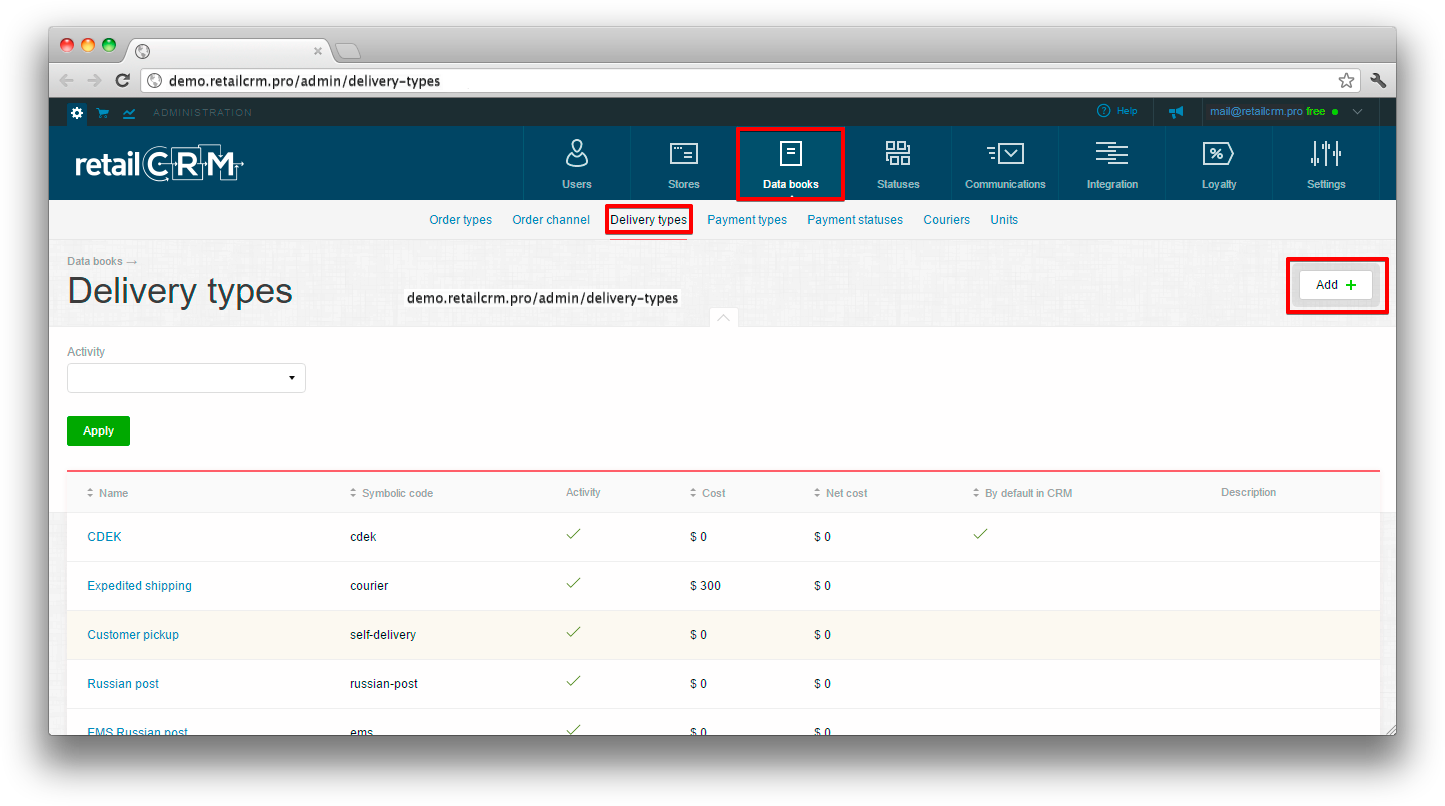
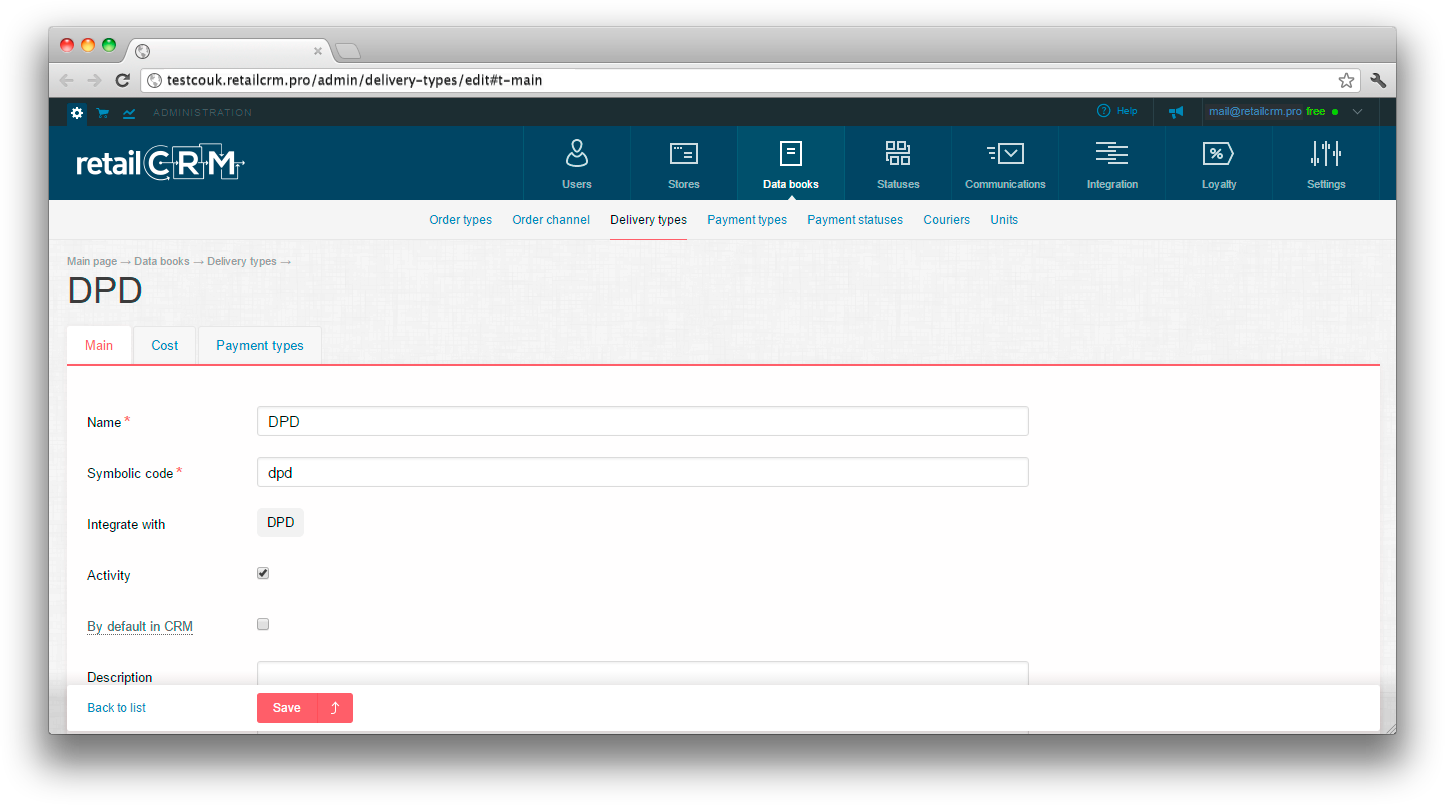
To be able to use DPD delivery services in the order, first you need to create DPD delivery type. Go to section Administration > Databooks > Delivery types and press “Add” button.
Then you need to configure the newly created delivery type:
After saving the newly created delivery type, a new tab “Cost” appears, in which you can specify cost and net cost by default for this delivery type. These fields are available for editing, if DPD integration settings have field “Delivery cost” configured as “Set manually”. If chosen as “Calculated automatically by the delivery service” or the delivery integration doesn’t allow manual delivery cost setting, the corresponding message will appear.
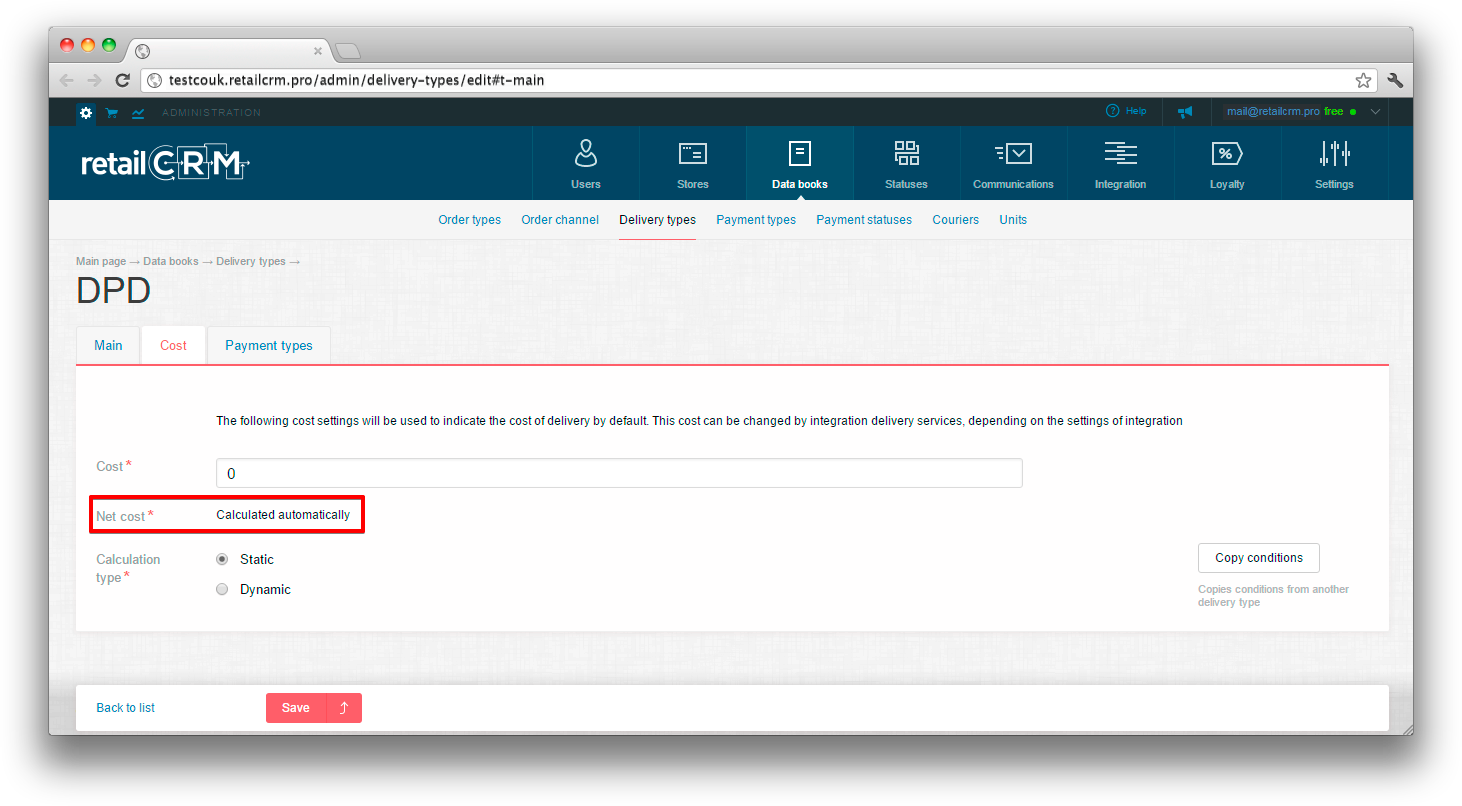
You can read more about delivery cost condition settings in this article.
Important: After saving delivery type, the field “Integrate with” becomes no longer available for editing and cannot be changed. If this delivery is no longer used by you, you can deactivate it by unchecking the “Activity” box.
Let's have a look at the order, where DPD delivery type is selected.
Note: there is an opportunity to create delivery from any country to Russia or from Russia to any country.

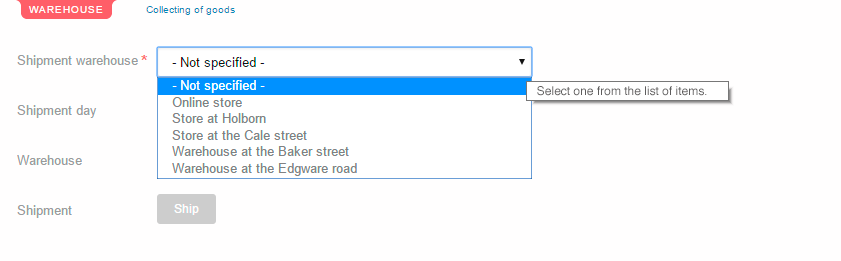
If you have warehouses and reservation functions connected, you have shipment area available. Here you need to specify the shipment warehouse. DPD delivery service will collect your goods from this warehouse.
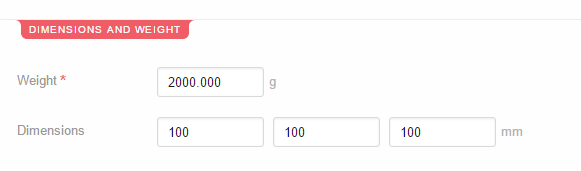
After that, pay attention to parcel dimensions. If there is a single parcel, it is enough to use main fields, that are situated before delivery type selection. Default values can be set for these dimensions in main system settings in section Administration > Settings > Orders.
The field “Do not send data to delivery service” allows not to send data to delivery service if it is already chosen. If you check this box, all necessary for delivery registration fields will become unnecessary. This functionality is useful in those cases, when items in the order are firstly made and packaged and only after that the order is sent to delivery service. If so, you need to uncheck the box near the field “Do not send data to delivery service” and fill in the necessary parameters for DPD.
The checkbox “Do not send data to delivery service” is activated by default. It is needed in case if the order will change in the future (For example, the customer asked to move the delivery date).
Important: The order will not be sent to delivery service, if it is in “Cancel” status group.
Note: triggers also have access to this field.

If you need to send several parcels in one order, you can choose a packaging. By default the whole order is considered as one package with weight and dimensions equal to weight and dimension of entire order.
When clicking the link, a popup window will appear, where you need to specify weight, dimensions and item for each parcel.
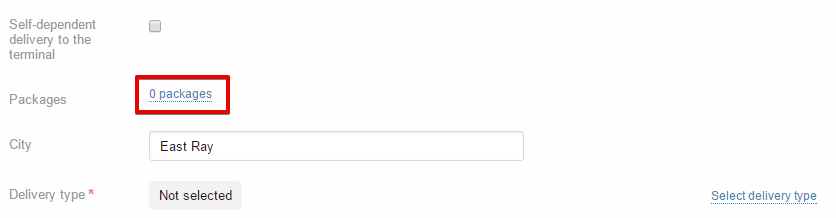

Right here you can add several packagings more.
Note: you can add a packaging for each item separately.
If to check the box “Self-dependent delivery to the terminal”, you will need to deliver the parcel to one of the DPD terminals yourself. In the field “ Terminal of sending” you need to enter first characters of the city, where your shop’s warehouse is, and the list of DPD terminals will appear, where you need to deliver the parcel before it goes to the customer. By that, the information about terminal working hours will be collected to the system, which can be passed to the courier.
If you have several parcels in the order, write in the dimensions in the “Parcels” area. For that press the link “Add parcel”. If dimensions were already entered in main settings, and you added new parcels, the priority will be after the information in parcels.
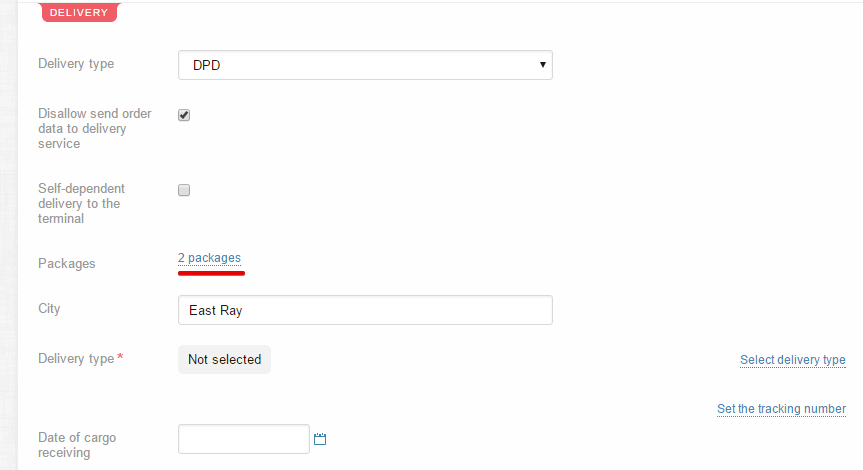
If parcels are of the same dimensions and weight, it is possible to specify the corresponding number in the field “Parcels number” and fill in all the dimensions only once. If parcels are different - it is possible to press the link “Add parcel” and fill in the dimensions for all other parcels.

The barcode number needs to be filled in only in case if you work with your own barcode system.
After that you need to select the terminal of shipment. If the box “self-arrival” was already checked in integration settings and the terminal is specified, the last will be displayed here. If not - type in the terminal by first characters. The address and working hours for the terminal will be specified.
You need to set the city of delivery, selecting it by first characters. When choosing the city, pay attention that settlement type is being displayed also (city, village, etc.). Region, which this city belongs to, will be selected automatically.
Then select the delivery method.
DPD delivery methods list will appear in additional window. It can be sorted by type and method(first column).
After selecting the DPD delivery type; delivery service name, DPD delivery cost and delivery time will appear in the order card.
After DPD receives the parcel, it sends the updated shipping cost to the retailCRM. The transferred data is recorded in the "Cost" field, as well as in the "Net cost" field, if it was not filled in manually.
Note: in case of using “Cash on delivery” payment, in the field “COD commission” the commission to delivery cost will be shown.
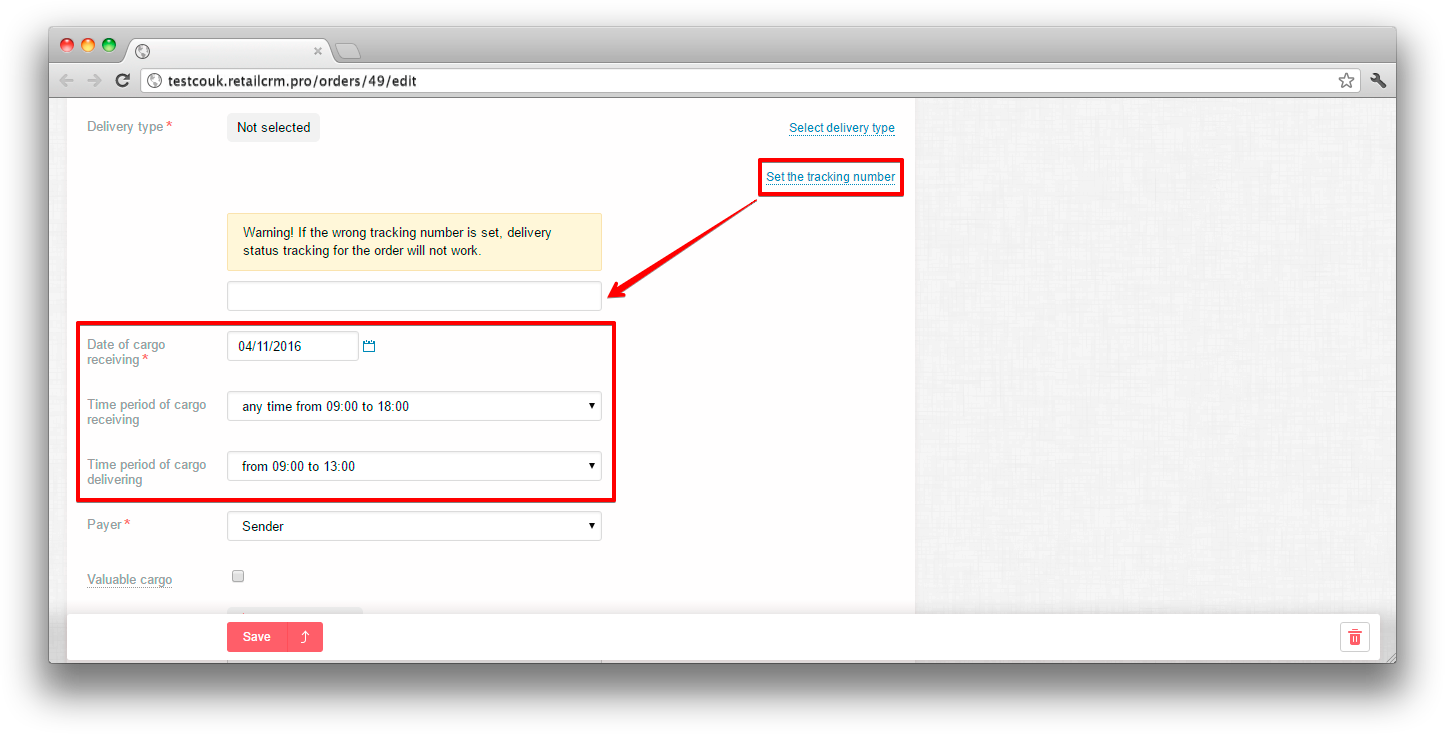
If there is the only parcel, it is possible to specify parcel dispatch number by which delivery status will be tracked.
Note: postal dispatch tracking is not supported in demo version.
Further you are offered to fill in the following fields: Dispatch acceptance date (mandatory), Dispatch acceptance time interval, Dispatch delivery time interval.
Dispatch acceptance time interval can be specified in default settings, if so, the corresponding field will be already filled in.
Dispatch delivery time interval is paid separately according to DPD terms.
Valuable cargo needs to be marked by the checkbox.
The sum of the declared value is displayed below. It is possible to specify the declared value for each item in the order; the declared value can be different from the actual item cost in the order. When clicking the sum of the declared value, opens a window that displays the declared value for each good separately. In this window you can edit the declared value.
Note that the declared value equals to the amount of goods by default (if the option “Declared value is zero by default” is not enabled).
The declared cost sum can be edited.
Note: Appraised value is calculated for the whole order.
Further you can select additional services:
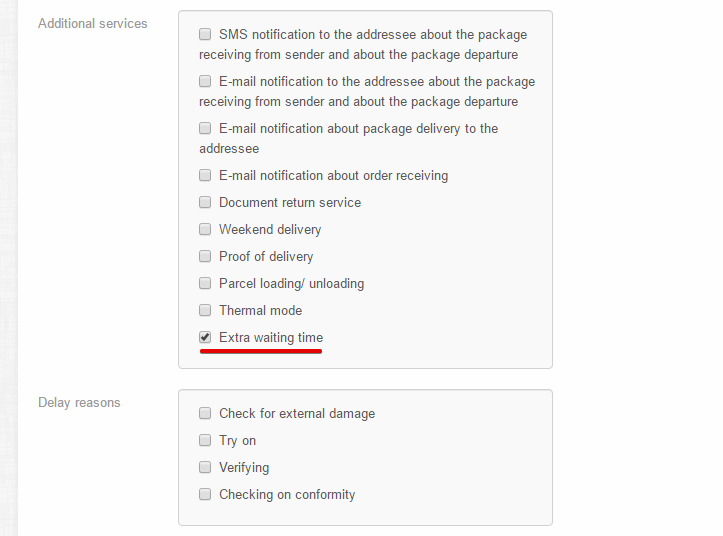
If to set a checkbox “Waiting at the address”, an additional area will appear, where you can select the reasons of waiting.
After filling in all the fields, the calculated delivery cost from DPD will appear.
Notes:
After order save and approval in DPD, the shipment number is assigned to it.
If suddenly DPD needs to move the order to the next day, they change shipment number. For the order in system not to loose status tracking, you need to manually change shipment number for the order with DPD delivery. Here you can print a DPD sticker or way-bill.
Note: Shipment number needs to be changed only in extreme cases, when this information to some reason wasn’t uploaded to the system.
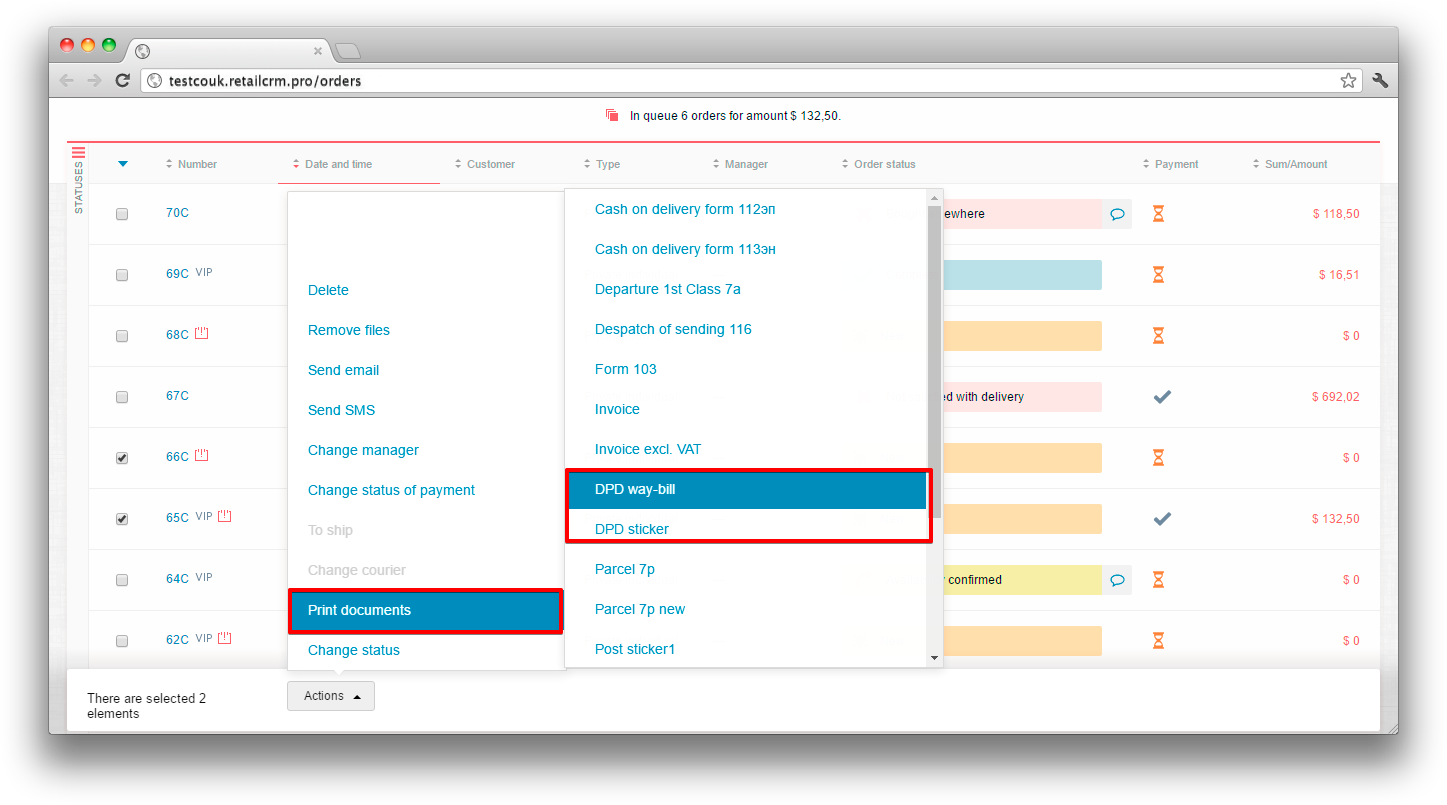
Printed forms “DPD sticker” and “DPD way-bill” are available in the order list for group printing.
This error appears in case, if the setting for tracking with approval is not connected at the DPD side. To eliminate this error you need to make a request to DPD support with the ask to connect the setting for tracking with approval.