Please note that initialization of the dialog with a new customer in chats is not possible at the moment.
The system provides a possibility of integration with online chat and popular messengers. Also, managers can communicate between each other within one system.
For access to chat functionality, responsible user group should have enabled rights of access to the chat functionality in the settings of user groups. We recommend to add a separate user group with access to the chats only. Users with administrator rights or enabled option “Administrator of Chats” have access to all dialogs of the system.
The enabled option “Administrator of Chats” gives administrative rights only within the framework of the chat functionality.

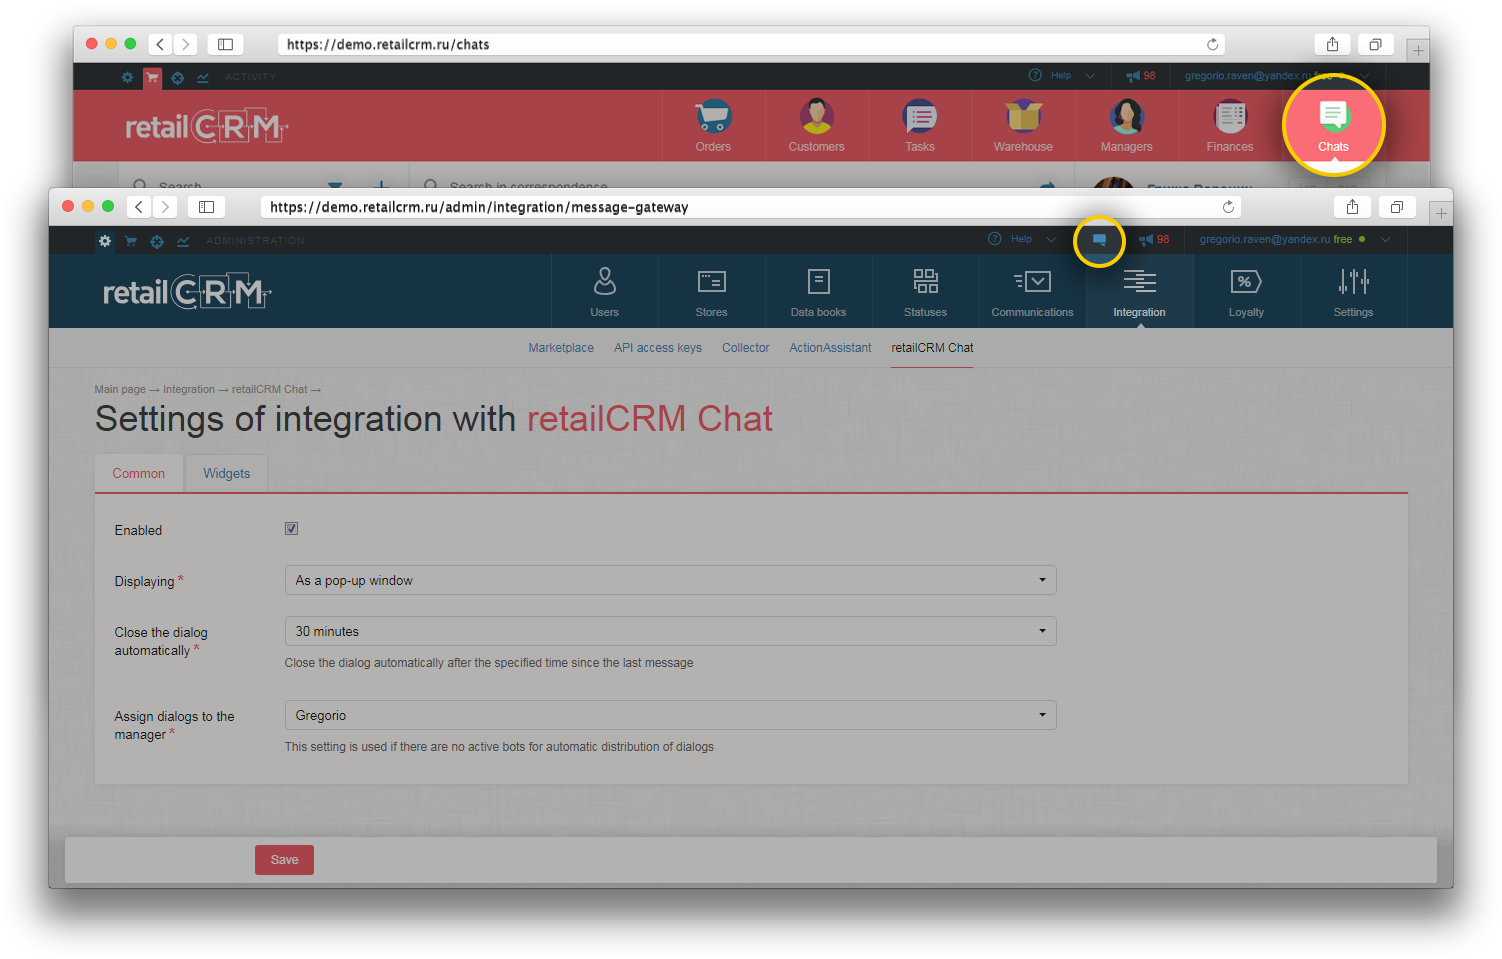
Please note that you should activate the option of using chats in the system interface. The option is activated in the subsection Administration > Integration > Chats.
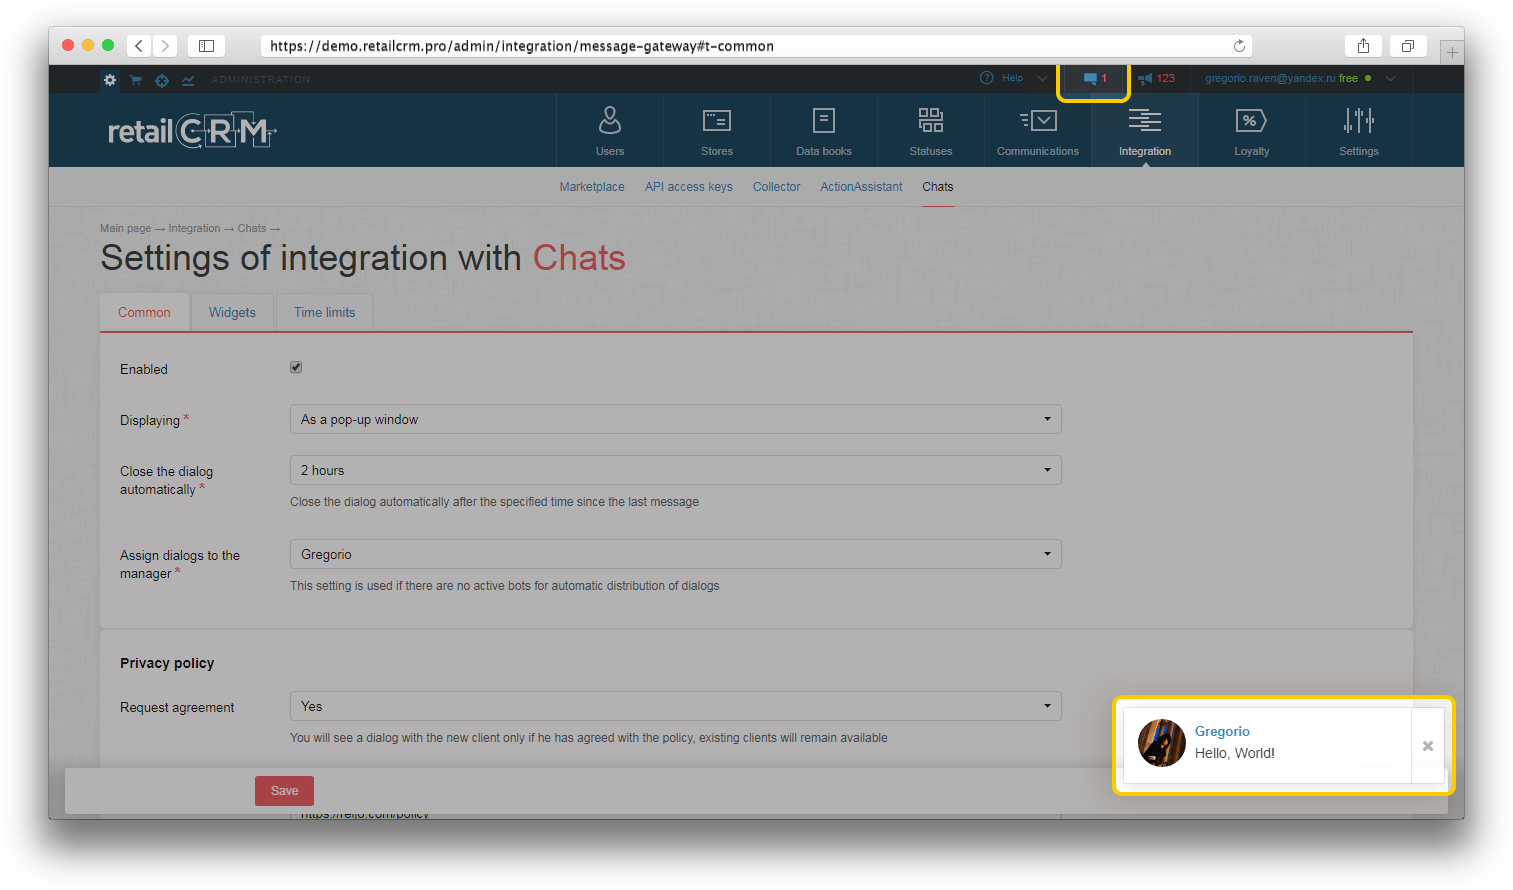
“Displaying” setting allows to choose the form for displaying chats in the system interface: as a pop-up window or as a separate section. The option “As a pop-up window” is used by default. The option “As a separate section” adds chats to the “Activity” section. This setting does not affect the chat functionality, it only makes changes to the display area.
Time to close the dialog automatically as well as managers responsible for dialogs are specified in this section. Automatic closing works only if the dialog is assigned to the manager. Unassigned dialogs are open during one month. After this term they are closed automatically.
Note: this setting is used if no bots for automatic distribution of dialogs are enabled in the system.

Automatic sending messages to customers is configured in the “Privacy Policy” subsection. If this option is enabled, the customer will receive an automatic message with a link to the Privacy Policy prior to starting the dialog. Only if the customer agrees to the terms, the dialog will be uploaded to your system.
This setting is applied to new dialogs only.
Channels in which the request will not be executed are specified in the field “Channels to be excluded”.
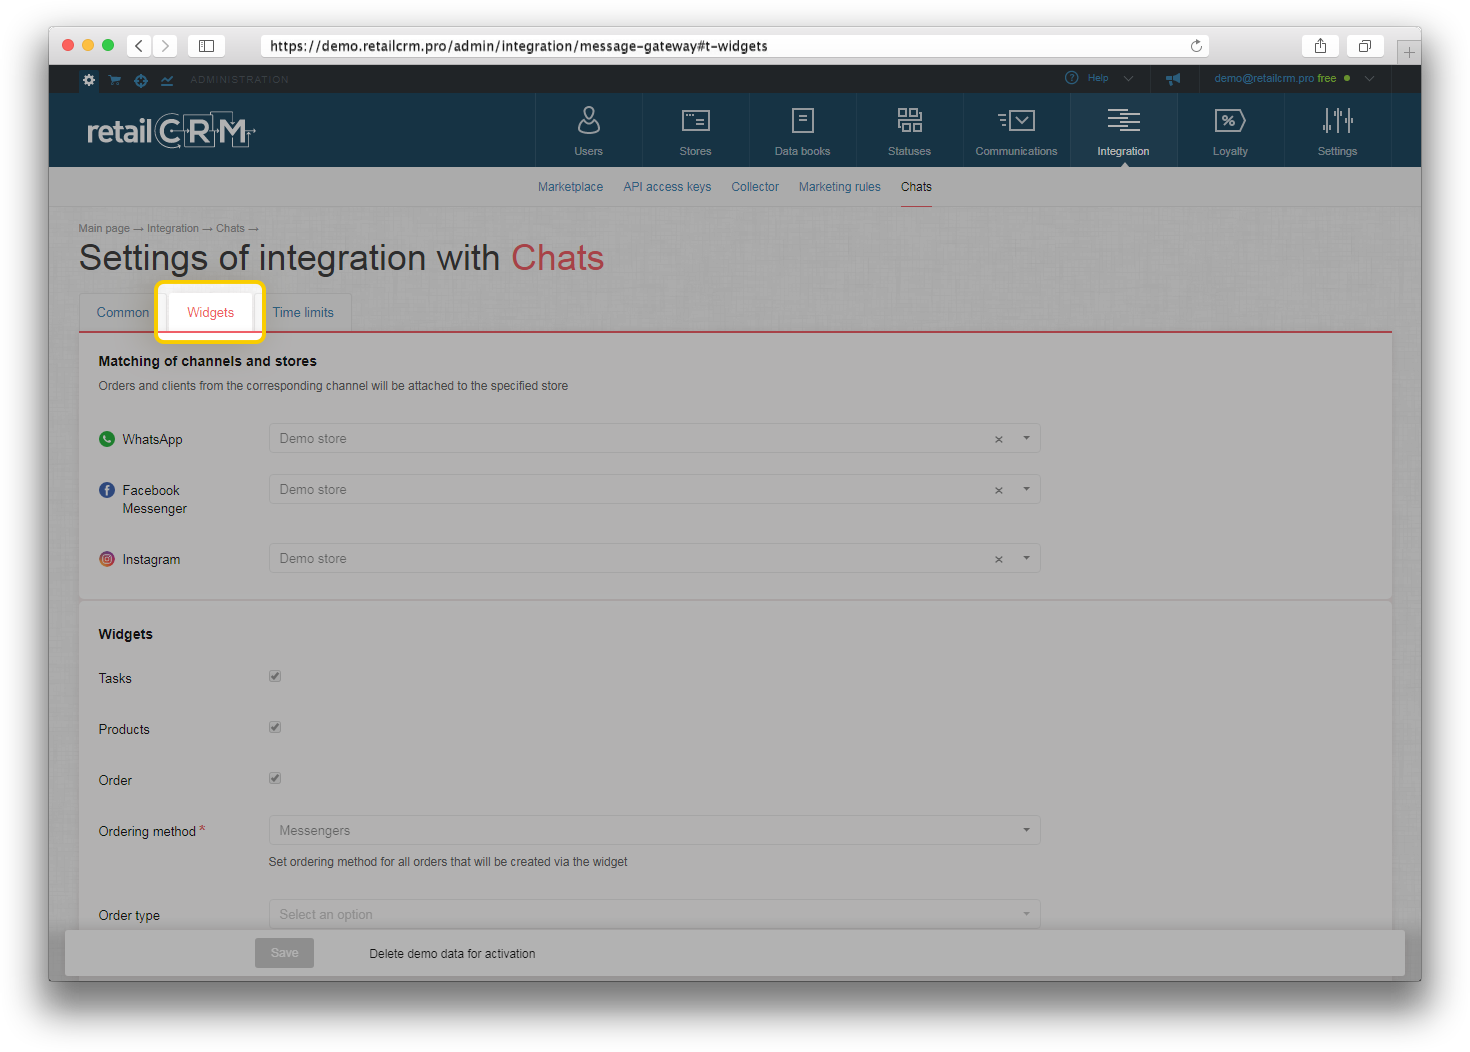
In “Widgets” tab is set up the matching of channels and stores. Orders and customers from the certain channel will be attached to the specified store. If the matching of channels and stores is not set up, then saving retailCRM Chat settings is impossible. This matching influences directly order creation from the dialog.
Note: after a new messenger has been connected or an additional channel has been added to the already existing connection, configure the matching of the channel and the store.
Such widgets as “Order”, “Products” and “Tasks” are enabled and disabled in the “Widgets” tab. When enabled, they are displayed in the chat dialog.
Ordering method and type of the order created via the dialog are set up in the section “Order” widget.
Selected settings affect displaying chats in the system after logging in: it is either a chats subsection or a dialog icon in the top of the system, clicking on which one may open a chat window.
Available messengers for integration are listed here.
Displaying expired dialogs is configured in the “Time limits” tab. Time limits can be set both for all channels and for each channel separately.
Two parameters are specified in the settings: “Warning” and “Time for processing the dialog” (required field).
When the dialog reaches the time specified in the “Warning” field, the dialog is marked with a yellow colour. When the dialog reaches the time specified in the “Time for processing the dialog” field, the dialog is marked with a red colour.
The count starts with the last message of the customer. Reassignment of the dialog does not reset the counter. This means that the dialog will be marked until the manager replies to the customer.
Note: the minimum value is 30 seconds. The specified time should be a multiple of this value.
Messengers which can be integrated with the system are listed here.
New message from the customer appears with a system notification - it is a text of the message sent. The number of unread dialogs is displayed in the top of the system.
In the chat window one can search both by dialogs and dialog messages.
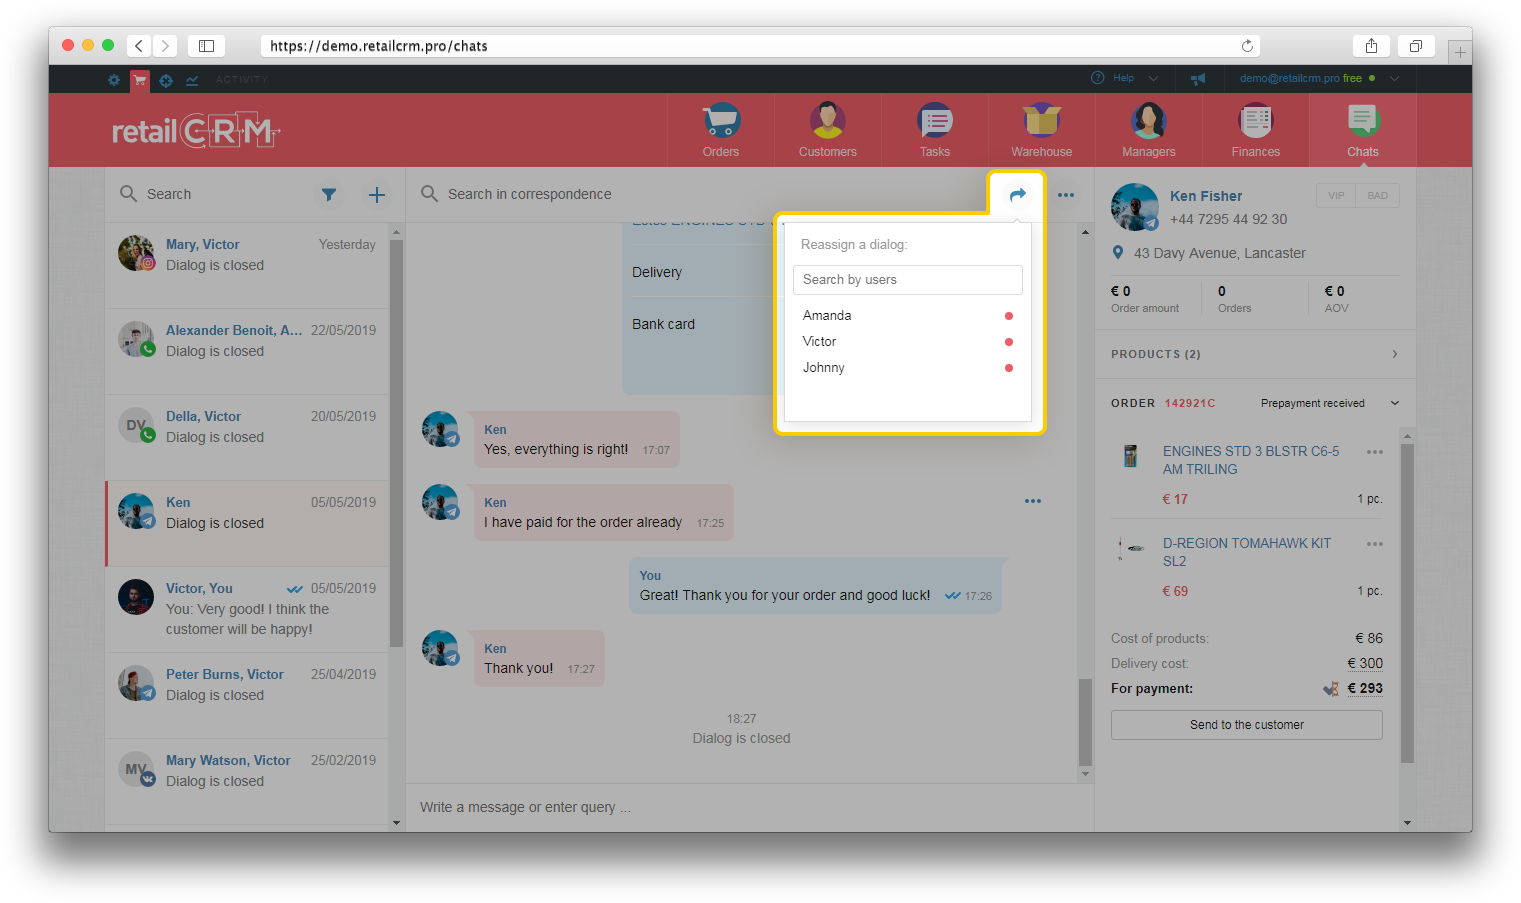
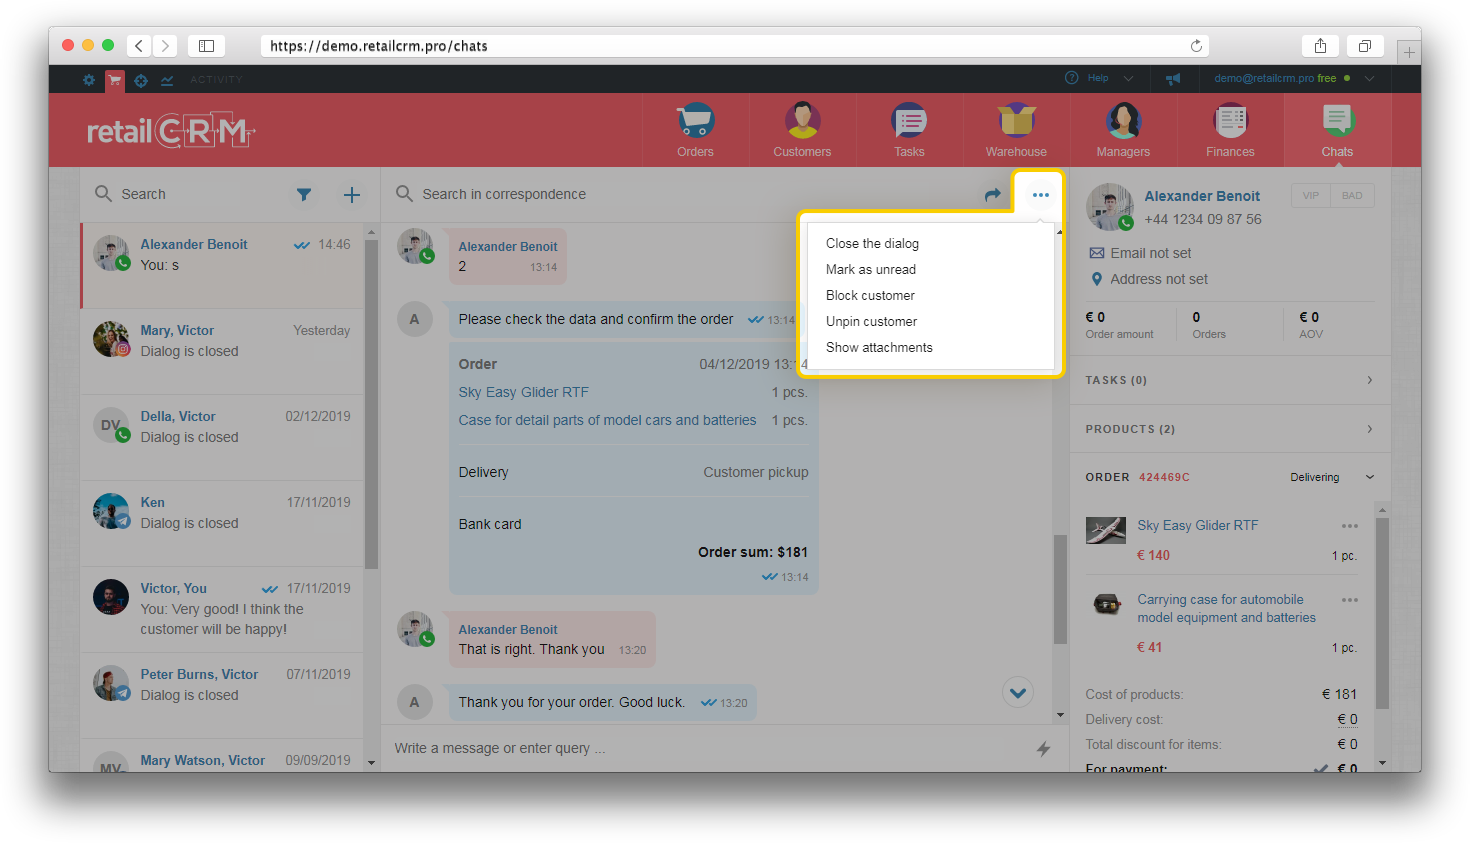
For reassignment of the dialog, click on a rounded arrow icon. When clicking, a window with available managers for assignment opens. Please note that only administrator or a manager, responsible for the dialog, can reassign the chat.
After reassignment of the dialog, the previously responsible manager will not be able to view the history of such dialog because the manager is removed from the dialog.
Even if the dialog is closed, reassignment is also available. In such case the dialog will keep its “Closed” status.
To the right of the arrow there is an icon with three dots. The following options are available when clicking it:
In the left column are displayed the customer name and the number of unread messages. If the customer has sent a message from the messenger, an appropriate icon will be displayed, as well as the channel name which is set when integrating with the messenger.

When hovering over the right of the message, three dots are displayed. If you click on them, a pop-up menu with additional options to interact with the message will appear. Additional options for interaction may differ depending on the messenger integrated.
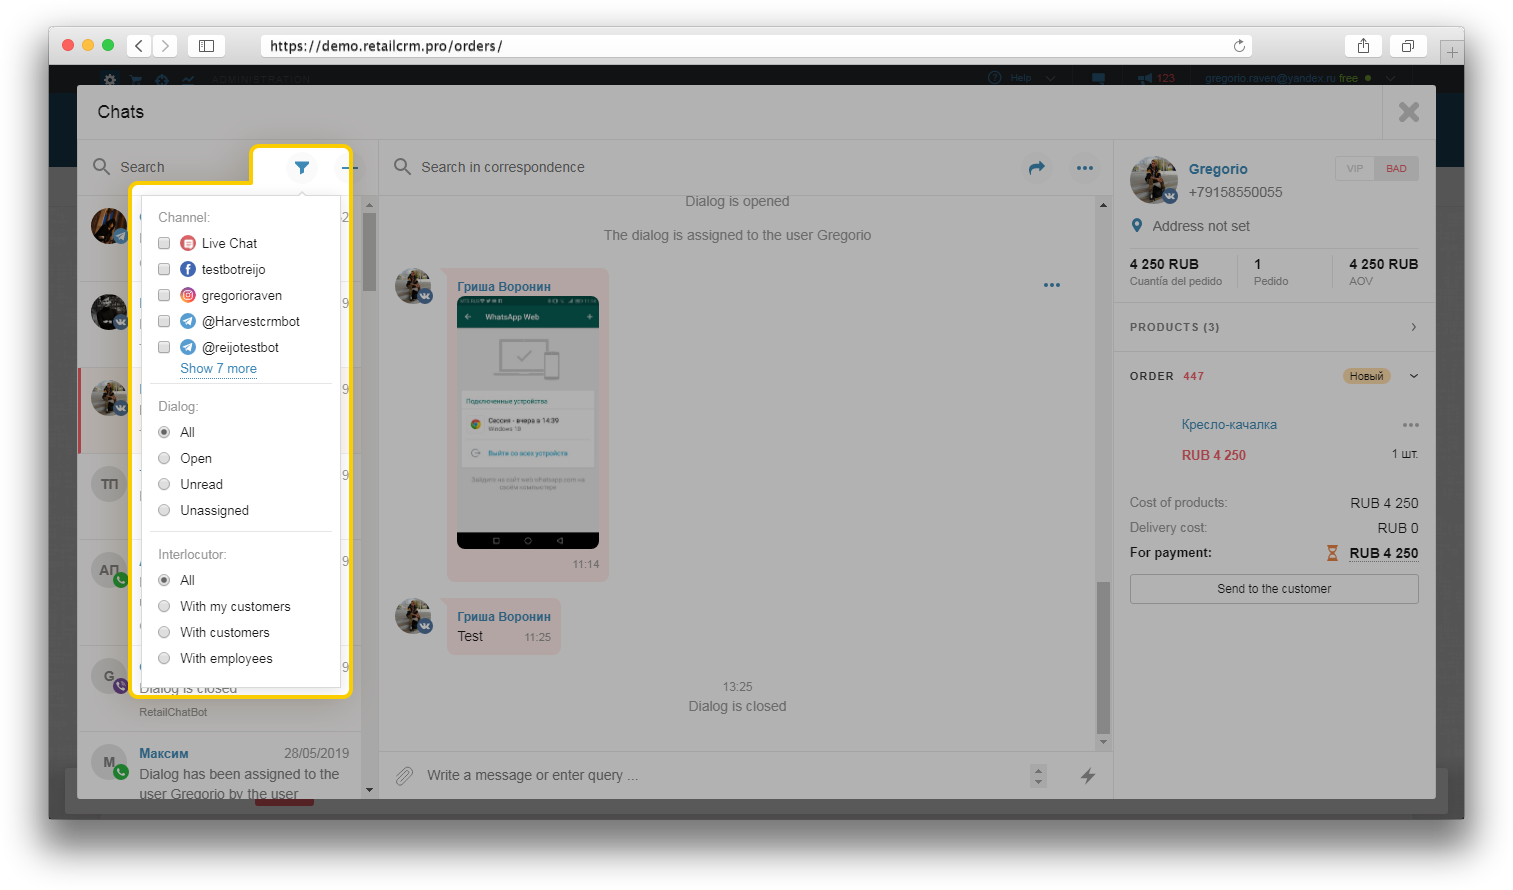
Filter by dialogs is displayed above the list of dialogs. A window with possible parameters for filtering appears when clicking the icon. First two variants are sorting the dialogs by:
Filtering is possible by:
Message feed shows who communicated with the customer in this dialog (manager or bot) and which one exactly and also dialog opening, closing and reassignment to another manager.
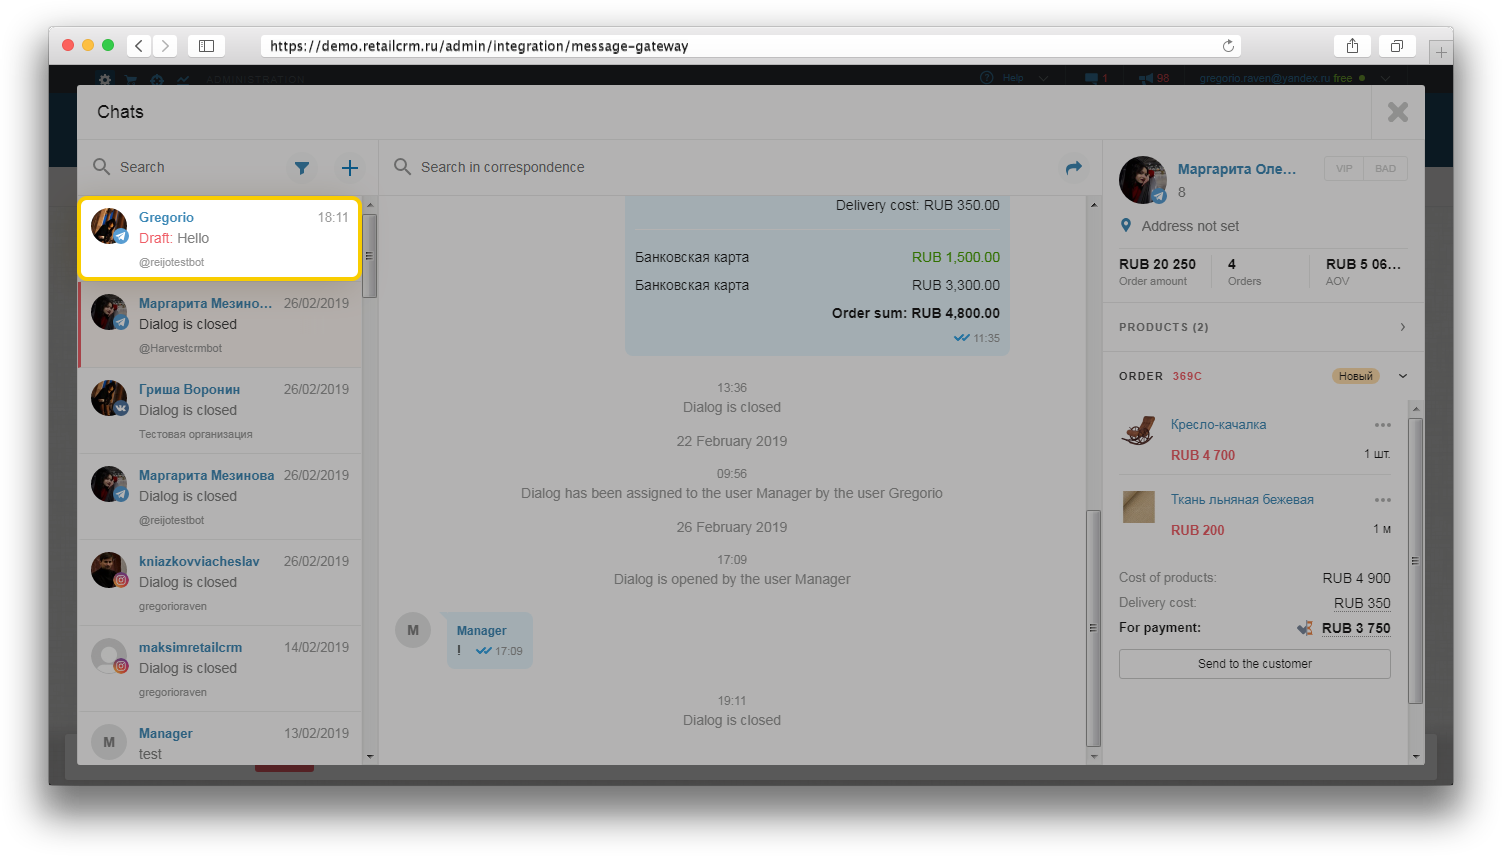
If the user has written a reply to the customer in the chat but has not sent it, the system saves the reply as a draft. The draft is displayed in the left panel of the message feed as the last communication with the customer.
Notes: the draft is not saved if the page is updated (F5). At the same time, closing the chat window or switching between the system sections do not influence the state of the draft.
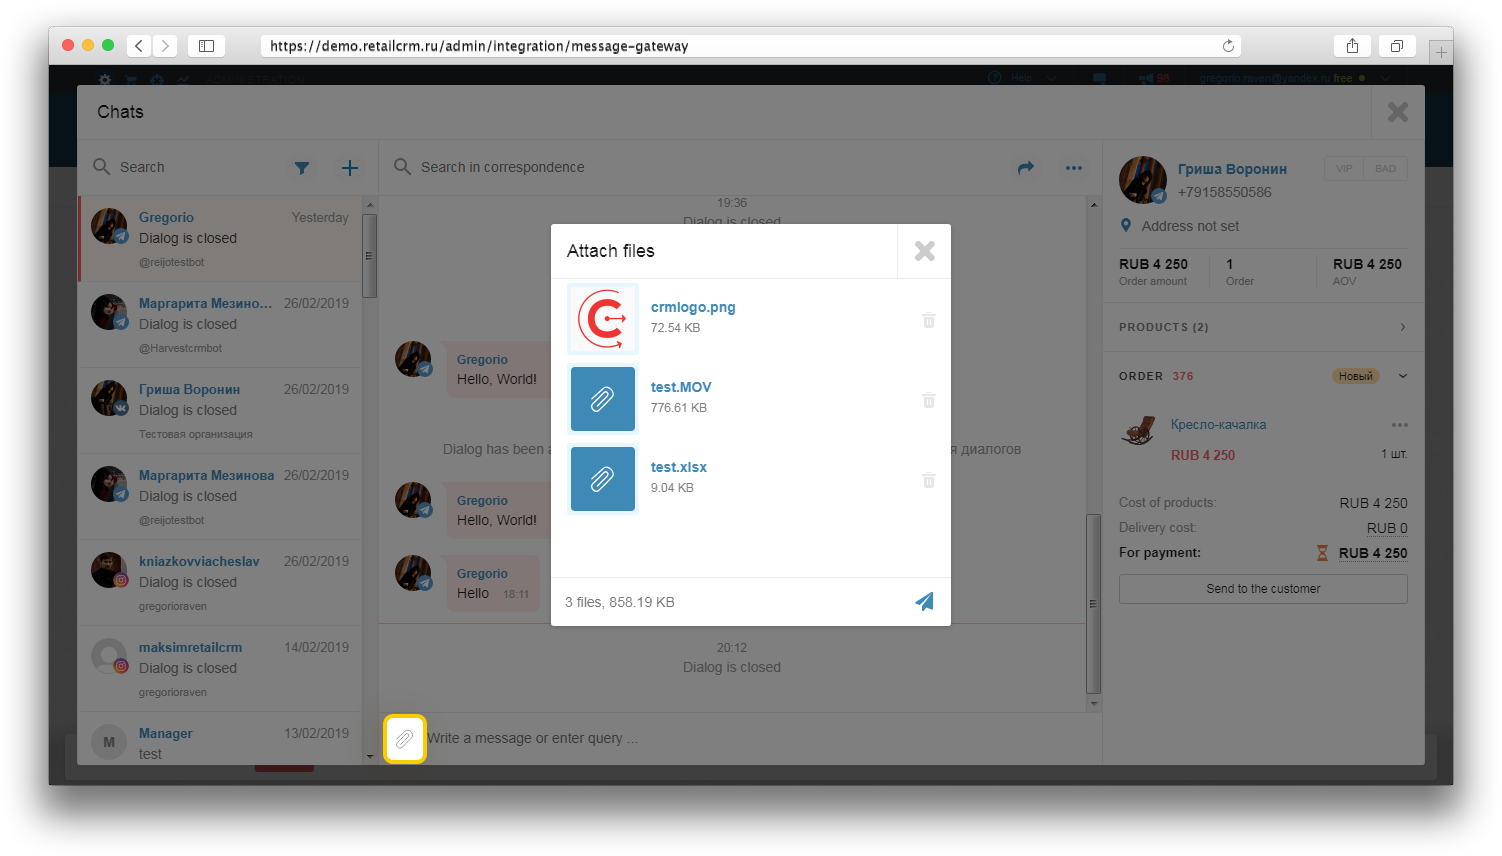
When a message has been typed, a paper clip icon is displayed, which allows to send a file or a photo to the interlocutor. It is necessary to click the icon and select one or several files. Files can also be sent by “drag and drop” method, this means that you should drag the files directly from the explorer to the chat interface. The maximum size of the files should not exceed 20 MB. Sent and received images of the dialog are displayed in preview at once.
Two icons are displayed to the right of the typing area: emoji and quick responses.
Please note that emoji are available only on MacOS and Windows 10.
After the dialog is closed, the manager can initiate communication with the customer. But if the chat was reassigned to another manager or to the bot, the previous manager failes to write in the chat.
Note: the maximum number of characters for sending is 2000 characters without spaces.
Also, delivery status is displayed for the sent messages. A clock icon means that the message is in the queue for sending. A tick icon indicates that the message has been delivered but not read. An icon with two ticks means that the recipient has read the message. A red cross icon indicates that the message has not been sent because of an error. The error can be connected both with problems of the integration module and lack of rights (for example, the dialog is not assigned to you at the moment). For Live Chat the red cross icon means that the customer has closed the Live Chat window or left the site.
Please note that the delivery status for the sent messages is displayed if the integration module has a such functionality.
Lightning bolt icon is to create and use quick replies in the chat.
Upon clicking this icon, the system will suggest to create a quick reply. If you already created quick replies, the list of created templates will be displayed. For editing or creating a new reply, click the pencil icon in the top right corner.
Note: only administrators of chats can create or edit previously created quick replies.
If you click the link “New quick reply”, a pop-up window will be opened in which the template for the quick reply is created.
First of all, add a command - the text of the template will be substituted when entering this command. The length of the text should not exceed 2000 characters (with spaces).
Also, it is possible to use macros or any twig templates to output customer information ({{ customer.). The following fields of the customer card are available here: “Name”, “E-mail” and “Phone”.
For more convenient use of quick replies, it is possible to create categories by themes.
The created replies can be output to the typing area by the entered command or the lightning bolt icon.
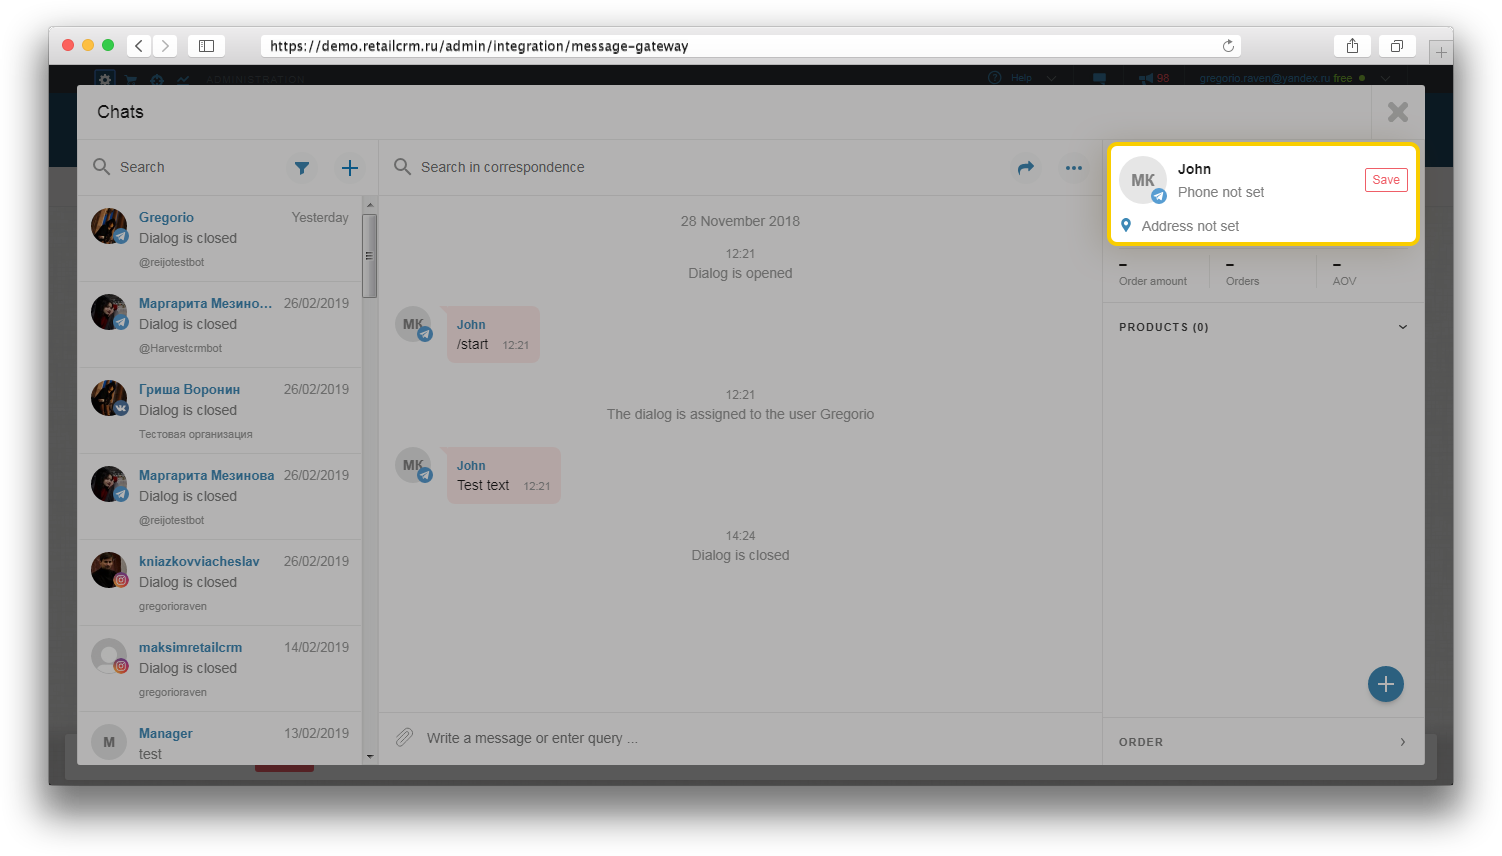
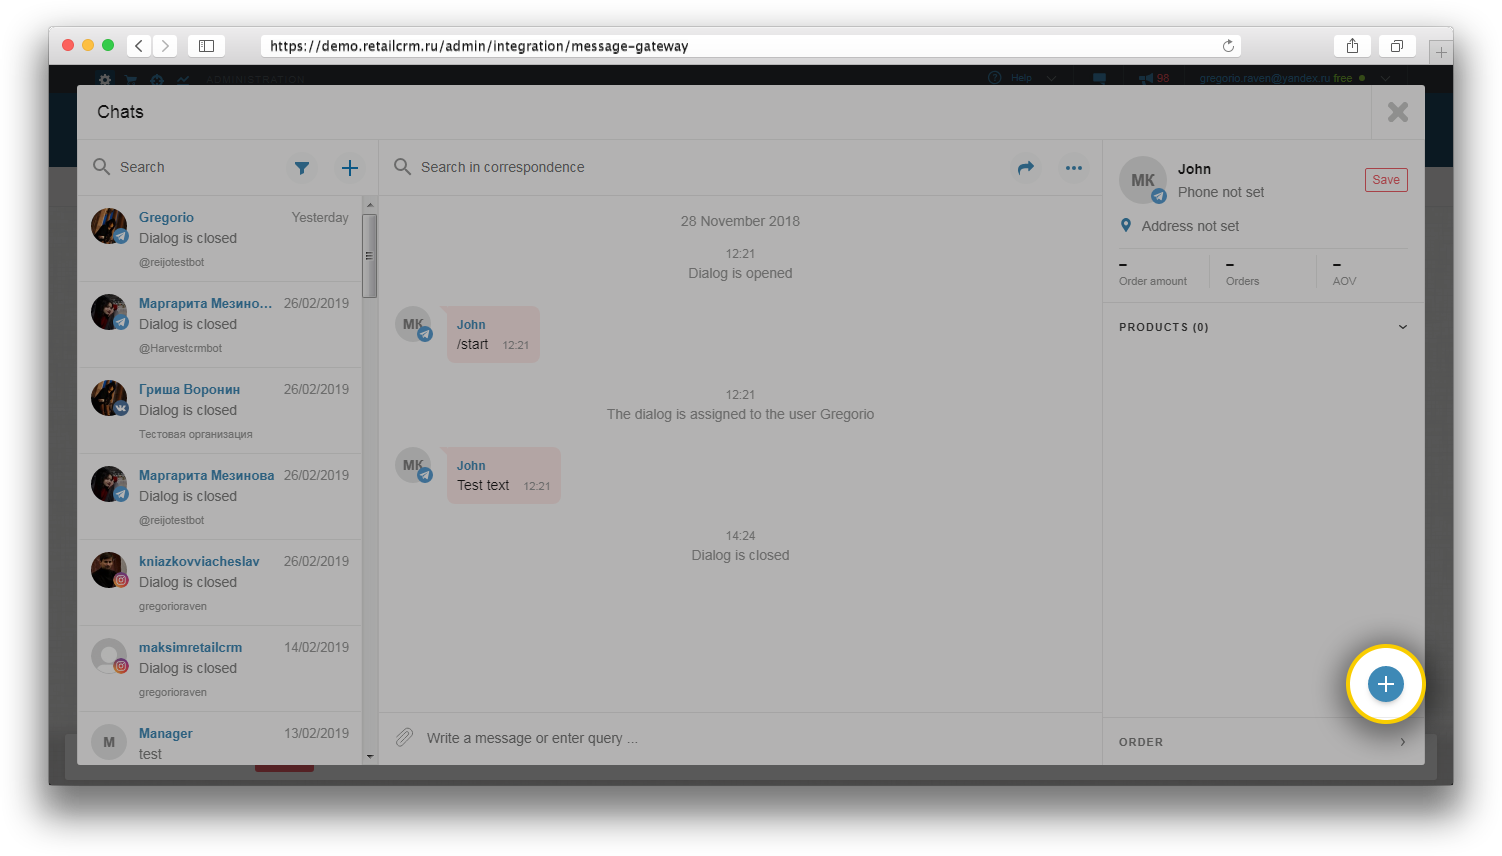
During the communication process with the customer, it is possible to save him/her in the base, specifying full name, VIP and BAD marks, address, phone number, products and create a new order with already entered data. VIP and BAD marks relate to the customer and not to the order.
If a new customer has written, “Save” button will be displayed next to his/her login. This button allows to add the new customer to your system. When hovering over the name, phone number and address (fields available for editing from the dialog), a pencil icon appears; this icon is for entering the information.
If it is necessary to save customers automatically, use the appropriate option in the settings of the bot for automatic distribution of dialogs.
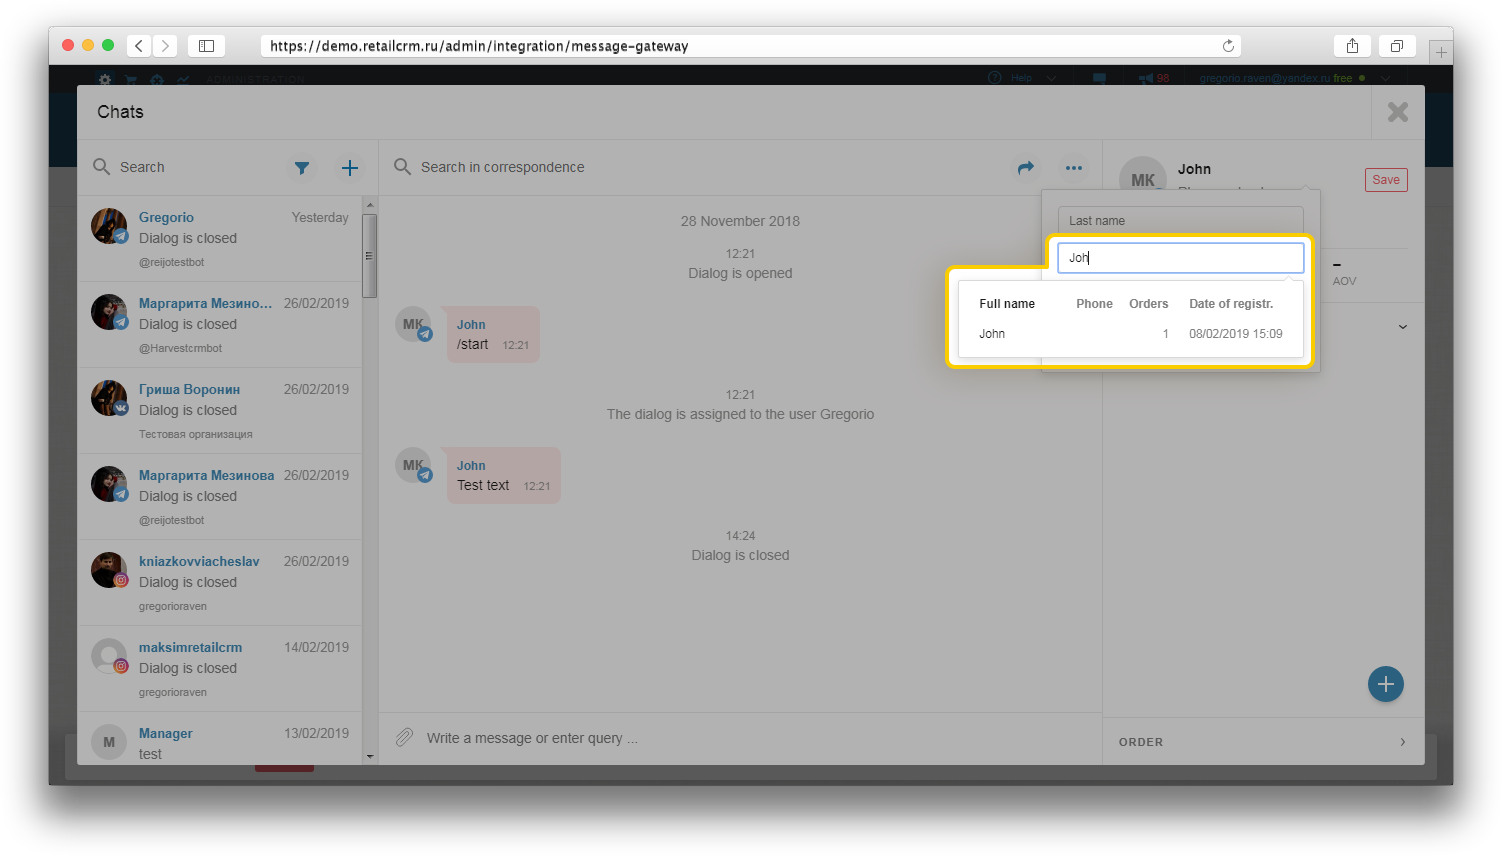
If the entered data is identical to the customer data of you base, a tooltip appears to bind the dialog to the already existing customer.
Notes:
If the customer decides to change the data in the dialog, it can be added automatically to the page of the already existing customer. Dialog window with options appears, when selecting a part of the customer text:
Atatch:14-bot-pomoshnik-en.png
If you click on the first four options, a window to change the data is displayed. If you click on “Find the product”, a window for finding the product by a keyword will be opened.
Current tasks of the customer are displayed in the “Tasks” widget for quick working with them. Let us imagine that during the discussion of the order with a customer, the latter asked you to call him in one hour to discuss a potential discount for the current order.
To create a task for this (or any other) event, just click the “+” button and you will find yourself on the page for editing the task.
Fill in the standard fields here: task description, completion time, order number or customer name for binding the task and specify the responsible manager. Read the article about working with tasks.
After saving, the task will be displayed in the special tab “All” or in the tab “My” if the author of the task is the person to whom this task is assigned.
If the task is not relevant anymore, make it completed by pressing the checkbox on the left. The completed task is displayed on the page until you reload the page or open another section.
Access to the “Tasks” widget is activated in the “Chats” settings (Administration > Integration > Chats > Widgets).
The number of available options for this widget as applied to the users is selected in “Administration” - we mean the rights for the blocks “Tasks” and “Chats”.
The “Product” widget is available in the above-mentioned dialog window. The widget is for search by products. Product name is inserted into the search bar automatically. The value of the search bar can be edited, filters of the left column can be applied, as well as sorting by name and price (not including price type).
Product can also be added by means of the plus icon. Click it and you will see the window for product selection as on the order page.
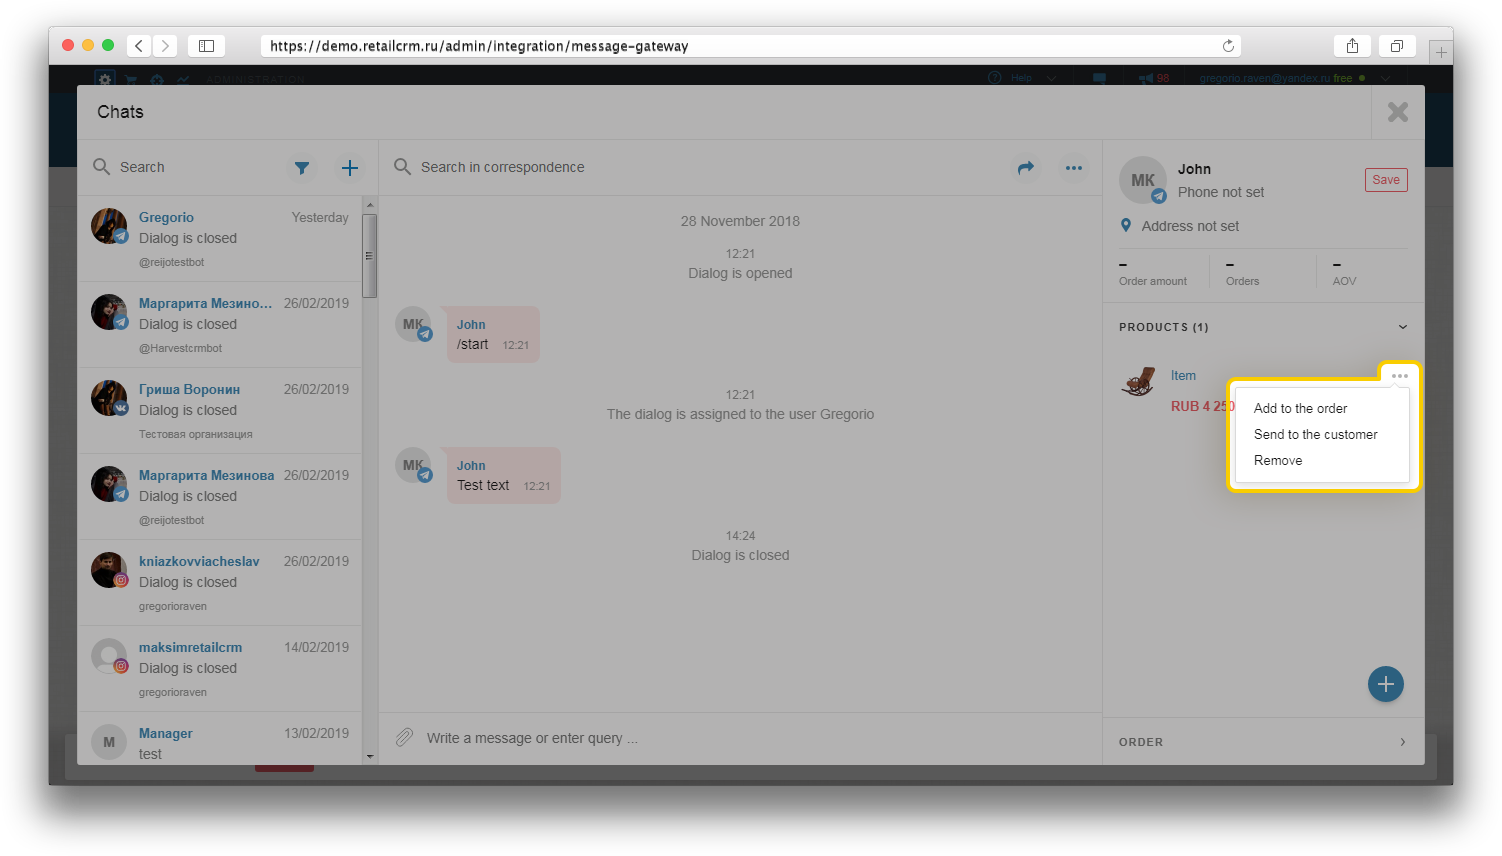
Selected items appear on the right-hand side. You can send the selected items to the customer for confirmation and add to the order in processing.
Alongside with the selected items, one can create the order directly from the chat window. It is possible to select the delivery type in advance.
Note: it is not possible to add the identical trade offers when creating an order in the chat. But remember that if the already created order contains the identical trade offers, they will be displayed in the chat interface.
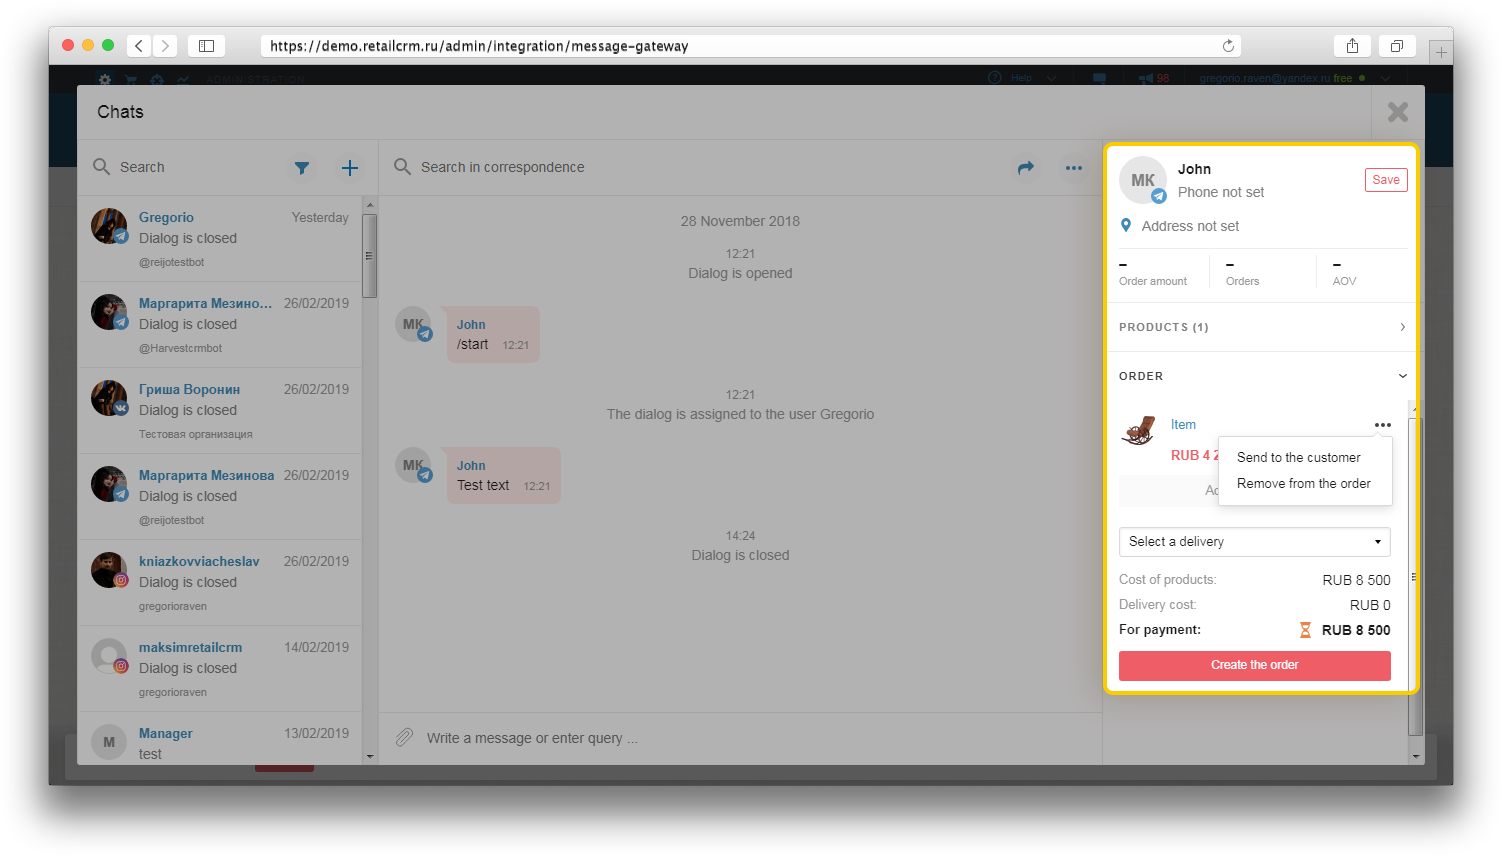
The order with the specified data is created after clicking the button “Create the order”. To send the order information, one should click the button “Send to the customer”.
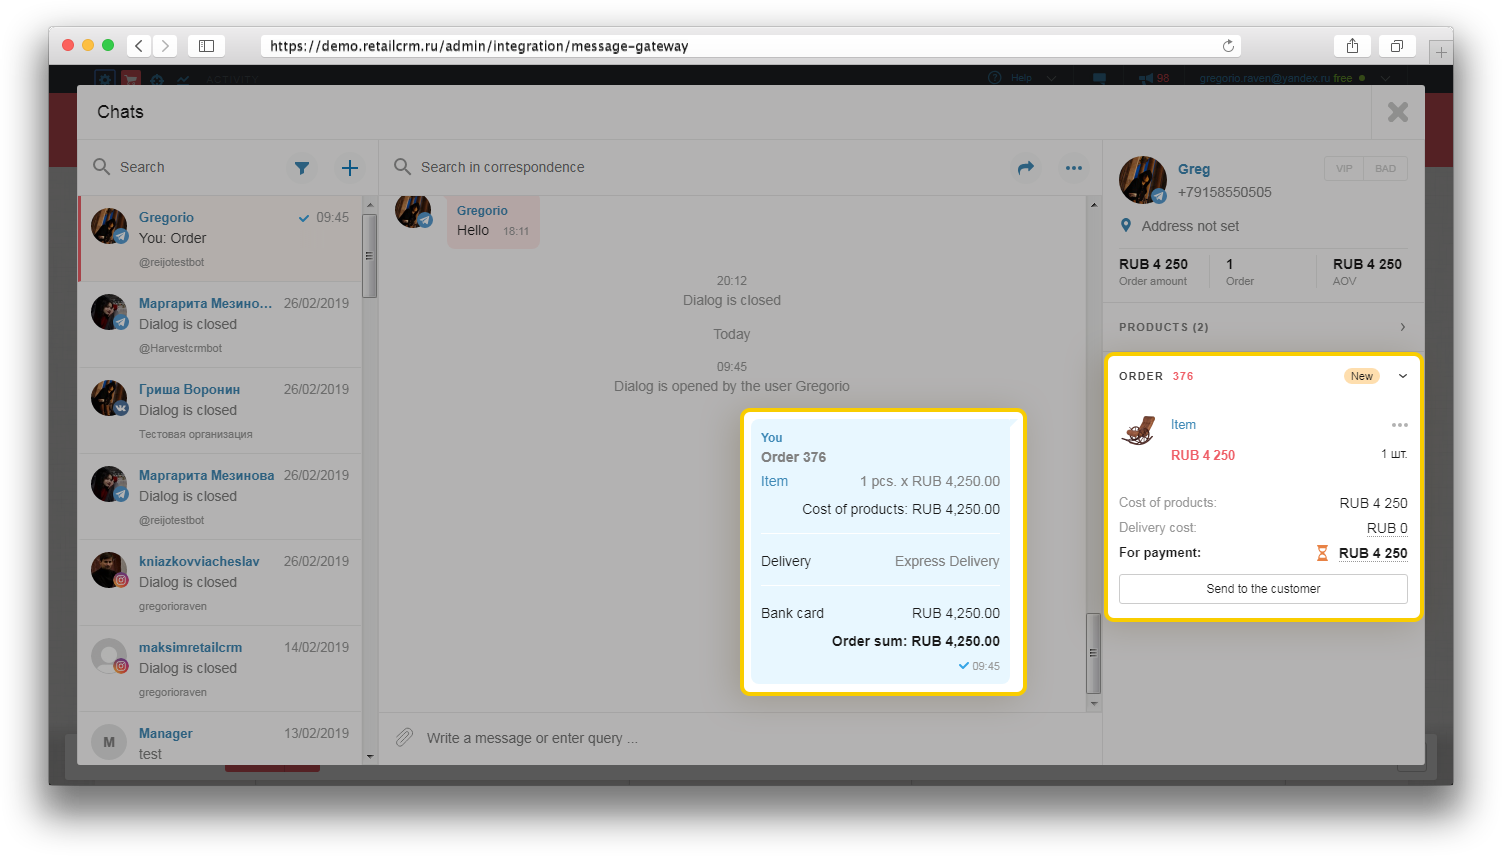
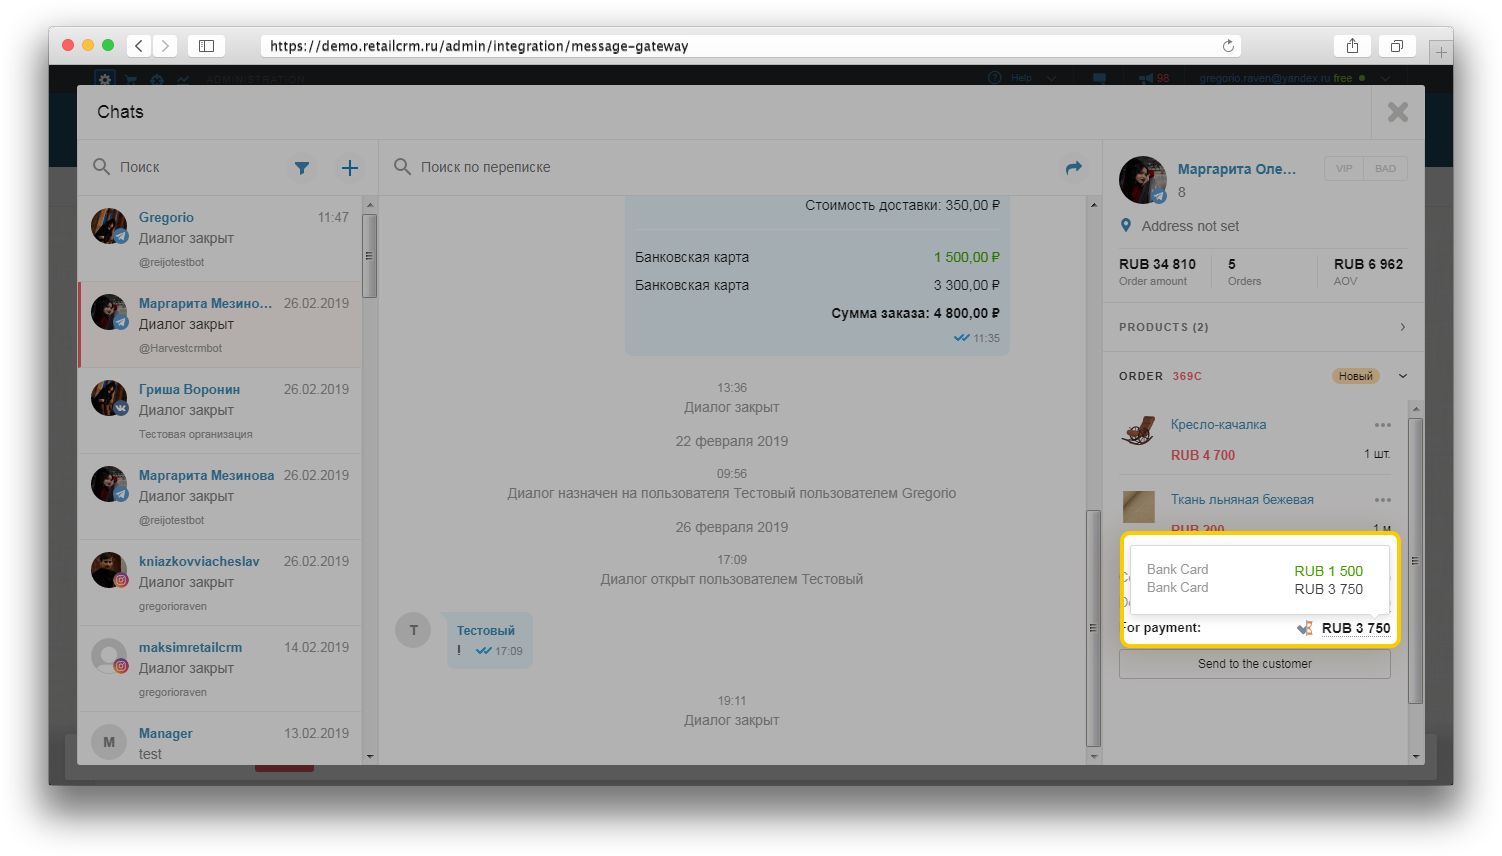
The “Order” widget defines more recent orders for displaying in the dialog taking into account the following parameters:
Order number, current order status and payment details will appear after creating.
Please note that the widget displays the order which is being processed at the moment. Orders in the final status (Completed/Cancelled) will not be displayed here.
Clicking the order number, you will find yourself in the created order. This option allows to update the information or change the order prior to sending it to the customer. For example, you can change the payment type or order details.
The sum for the current order is displayed in the field “For payment”. To the left of the sum is displayed the payment status - partial payment, full payment or non-payment. When clicking on the delivery cost, the delivery details are displayed. When clicking on the order sum, the payment types specified in the order are displayed. Already paid types are of green color.
Note: the data of the current dialog with the combined customer is also updated, when combining customers.
All customer dialogs are stored on the customer page in “Chats” tab of “In work” block. Also, it is possible to find here the starting date of the dialog, its status, the total number of messages in the dialog and the channel.
Read more details in this article.